
In the period of microservices, the place purposes are divided into smaller, independently deployable providers, managing and securing the communication between these providers turns into essential. This is the place an API gateway comes into play.
An API gateway serves as a central entry level for all consumer requests. It gives numerous functionalities equivalent to routing, load balancing, authentication, and price limiting.
In this text, we’ll discover how one can construct out a customized API gateway utilizing Node.js.
Here’s what we’ll cowl:
- What is an API Gateway?
- Security in API Gateways
- How to Build a Custom API Gateway with Node.js
- Conclusion
Prerequisites
This is a newbie’s information that ought to be comparatively straightforward to observe. But to totally perceive and get probably the most out of it, primary information of Node.js equivalent to set up, organising, and spinning up a server is significant.
Without additional ado, let’s dig in!
What is an API Gateway?
API gateways act as intermediaries between purchasers and back-end providers in a Microservices structure. They summary the complexity of the underlying providers and expose a unified API to purchasers.
By consolidating a number of service endpoints right into a single entry level, API gateways simplify client-side code and enhance the general scalability and efficiency of the system.
Compared to different widespread API gateway options like Kong, AWS API Gateway, and Tyke, constructing a customized API gateway utilizing Node.js provides flexibility and customization choices tailor-made to your particular mission necessities.
To get somewhat extra understanding of what an API gateway is, I like to recommend you try this text when you haven’t.
Benefits of Using an API Gateway:
- Improved scalability and efficiency by means of request routing and cargo balancing: API gateways facilitate request routing and cargo balancing, distributing incoming visitors throughout a number of backend providers to make sure optimum efficiency and scalability.
- Simplified client-side code by offering a unified API endpoint: With a unified API endpoint offered by the API gateway, purchasers can work together with a number of providers seamlessly, decreasing complexity and enhancing the maintainability of client-side code.
- Enhanced Security: API gateways provide strong security measures equivalent to authentication, authorization, and price limiting, defending backend providers from unauthorized entry and potential safety threats.
Security in API Gateways
Security is paramount in trendy software program improvement, particularly when coping with distributed methods and microservices. API gateways play an important function in imposing safety measures to safeguard delicate knowledge and stop unauthorized entry to APIs.
Common security measures carried out in API gateways embody:
- JWT Authentication: Verifying the identification of purchasers utilizing JSON Web Tokens (JWT) to make sure safe communication between purchasers and backend providers.
- OAuth2 Integration: Providing safe entry management and authorization mechanisms utilizing OAuth2 protocols to authenticate and authorize consumer requests.
- SSL Termination: Encrypting visitors between purchasers and the API gateway utilizing SSL/TLS protocols to guard knowledge in transit from eavesdropping and tampering.
Now it’s best to have a common overview of what an API gateway is and why it is essential.
In the subsequent part, we are going to delve into the method of constructing a customized API gateway utilizing Node.js. I’ll reveal tips on how to implement security measures utilizing the http-proxy-middleware package deal.
How to Build a Custom API Gateway with Node.js
As I’ve already mentioned, we’ll be utilizing Node.js for this tutorial. In my opinion, Node.js is by far the simplest and hottest internet framework. Anyone can discover ways to use it.
For this information, I assume you already know or have a primary understanding of Node.js and tips on how to arrange a server.
Getting Started – Installations and Setup
To get began, create a brand new folder referred to as “API-gateway” fully exterior your front-end or your back-end code. Once the folder is created, open it in your terminal and run npm init -y. This will arrange npm and then you definately’re able to roll issues out!
We’ll be utilizing a few NPM packages, and it’s finest to put in them now. The most essential one is the http-proxy-middleware. This middleware or package deal is what is going to route our requests from one endpoint (www.area.com/auth ) to every corresponding endpoint (www.externaldomain.com/v1/bla/auth, www.externaldomain.com/v1/bla/tasks ) as outlined in our microservices.
To set up the http-proxy-middleware, merely run npm i http-proxy-middleware on the basis folder in your terminal. If it is put in, you’re good to go.
Next, we’ll want the remaining packages. Simply run npm set up specific cors helmet morgan in your terminal within the root folder of the API gateway.
The above command installs the next:
- Express: our Node.js library for creating our server and operating our code
- Cors: middleware to handle and management any cross-origin requests
- Helmet: one more middleware for securing our HTTP response headers
- Morgan: a logging software we are able to use to trace each success and error logs
Lastly, set up Nodemon. This is a software that spins up your server everytime you save a file utilizing npm set up --save-dev nodemon.
Now, go to your package deal.js file and replace the scripts part. It ought to appear like this:
"scripts": {
 "begin": "node index.js",
 "dev": "nodemon index.js",
 "take a look at": "echo "Error: no take a look at specified" && exit 1"
},
To lastly begin testing issues out, create a brand new file referred to as index.js in that very same api-gateway folder.
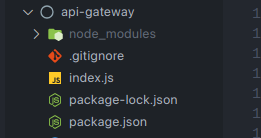
If you get the whole lot proper, it’s best to have the next recordsdata:
Putting it All Together
A very good code apply is to interrupt issues down as a lot as attainable into smaller parts.
But for this information, we’re going to interrupt that rule and put all of the code into that one index.js file we created from the steps above. We’ll be doing it this fashion as a result of having too many recordsdata and an excessively advanced arrange right here may be complicated, particularly when you’re studying how issues work.
First factor first, open the index.js file you’ve created and paste the next code into it:
const specific = require("specific");
const cors = require("cors");
const helmet = require("helmet");
const morgan = require("morgan");
const { createProxyMiddleware } = require("http-proxy-middleware");
In the code above we’re simply importing packages.
Next up, initialize and arrange the imported packages like this:
// Create an occasion of Express app
const app = specific();


// Middleware setup
app.use(cors()); // Enable CORS
app.use(helmet()); // Add safety headers
app.use(morgan("mixed")); // Log HTTP requests
app.disable("x-powered-by"); // Hide Express server data
Remember that an API gateway is a single supply of fact for all of your providers or exterior URLs. This means you could produce other providers or URLs you wish to ahead the requests to.
Assuming you have already got your different providers operating both domestically or deployed, let’s transfer to the subsequent part of the code.
// Define routes and corresponding microservices
const providers = [
 {
   route: "/auth",
   target: "https://your-deployed-service.herokuapp.com/auth",
 },
 {
   route: "/users",
   target: "https://your-deployed-service.herokuapp.com/users/",
 },
 {
   route: "/chats",
   target: "https://your-deployed-service.herokuapp.com/chats/",
 },
 {
   route: "/payment",
   target: "https://your-deployed-service.herokuapp.com/payment/",
 },
 // Add more services as needed either deployed or locally.
];
In the above code, we created a providers array record and outlined objects every containing routes (the place we’ll make requests to) and targets (the place the requests will probably be forwarded to).
Make positive to replace the routes and targets to fit your wants.
Can you guess what’s subsequent…?
Well, it’s lastly time to create the easy logic to ahead the requests to our goal URL, organising a price restrict and timeouts. And have you learnt what’s coming subsequent? A code pattern, lol:
// Define price restrict constants
const rateLimit = 20; // Max requests per minute
const interval = 60 * 1000; // Time window in milliseconds (1 minute)

// Object to retailer request counts for every IP handle
const requestCounts = {};

// Reset request rely for every IP handle each 'interval' milliseconds
setInterval(() => {
  Object.keys(requestCounts).forEach((ip) => {
    requestCounts[ip] = 0; // Reset request rely for every IP handle
  });
}, interval);

// Middleware operate for price limiting and timeout dealing with
operate rateLimitAndTimeout(req, res, subsequent) {
  const ip = req.ip; // Get consumer IP handle

  // Update request rely for the present IP
  requestCounts[ip] = (requestCounts[ip] || 0) + 1;

  // Check if request rely exceeds the speed restrict
  if (requestCounts[ip] > rateLimit) {
    // Respond with a 429 Too Many Requests standing code
    return res.standing(429).json({
      code: 429,
      standing: "Error",
      message: "Rate restrict exceeded.",
      knowledge: null,
    });
  }

  // Set timeout for every request (instance: 10 seconds)
  req.setTimeout(15000, () => {
    // Handle timeout error
    res.standing(504).json({
      code: 504,
      standing: "Error",
      message: "Gateway timeout.",
      knowledge: null,
    });
    req.abort(); // Abort the request
  });

  subsequent(); // Continue to the subsequent middleware
}

// Apply the speed restrict and timeout middleware to the proxy
app.use(rateLimitAndTimeout);

// Set up proxy middleware for every microservice
providers.forEach(({ route, goal }) => {
  // Proxy choices
  const proxyOptions = {
    goal,
    changeOrigin: true,
    pathRewrite: {
      [`^${route}`]: "",
    },
  };

  // Apply price limiting and timeout middleware earlier than proxying
  app.use(route, rateLimitAndTimeout, createProxyMiddleware(proxyOptions));
});
I added a bunch of excellent code feedback that will help you perceive what is going on on.
Congratulations if you already know what’s taking place above. If you don’t, you may learn concerning the http-proxy-middleware package deal.
But let’s get severe, we’re not achieved but.
The above code nonetheless gained’t work, as we’d like yet one more factor: writing a operate to start out the server when referred to as upon.
Add the next code pattern to the underside of the index.js after all the code you’ve added above:
// Define port for Express server
const PORT = course of.env.PORT || 5000;


// Start Express server
app.hear(PORT, () => {
 console.log(`Gateway is operating on port ${PORT}`);
});
With that, whenever you run npm run dev, it spins up your server and it’s best to be capable of take a look at this out utilizing instruments like Postman or some other software you employ to check APIs.
Now, earlier than we go, let’s attempt to make this somewhat bit spicy!
Let’s add a 404 operate to trace and return a pleasant 404 message to a person in the event that they navigate or ship a request to a URL that doesn’t exist.
So on our providers array outlined above, we don’t have any routes outlined for merchandise. This signifies that if a person sends a request to /product, they’d get a server error as a result of the request can’t be dealt with.
To inform the person that the URL will not be discovered, we are able to add the next code pattern simply earlier than we outline the port and take heed to it:
// Handler for route-not-found
app.use((_req, res) => {
 res.standing(404).json({
   code: 404,
   standing: "Error",
   message: "Route not discovered.",
   knowledge: null,
 });
});


// Define port for Express server
Conclusion
Building a customized API gateway with Node.js provides builders a versatile and customizable resolution for managing, routing, and securing API calls in a microservices structure.
Throughout this tutorial, we have explored the elemental ideas of API gateways, together with their function in simplifying client-side code, enhancing scalability and efficiency, and enhancing safety.
By leveraging the facility of Node.js and the http-proxy-middleware package deal, we have demonstrated tips on how to implement a primary API gateway that proxies requests to a number of backend providers. We’ve additionally enhanced our gateway with important options equivalent to price limiting and timeouts to make sure dependable and safe communication between purchasers and providers.
As you proceed to discover the world of microservices and distributed methods, do not forget that API gateways play an important function in orchestrating communication and imposing safety measures. Whether you select to construct a customized resolution or make the most of current gateway platforms, understanding the ideas and finest practices outlined on this tutorial will empower you to architect strong and scalable methods.
I encourage you to experiment with the code samples offered and discover additional customization choices to fit your mission’s distinctive necessities. The full supply code for this tutorial will be discovered right here: https://github.com/irorochad/api-gateway.
Thank you for becoming a member of me on this journey to discover the intricacies of API gateways with Node.js. Happy coding!