
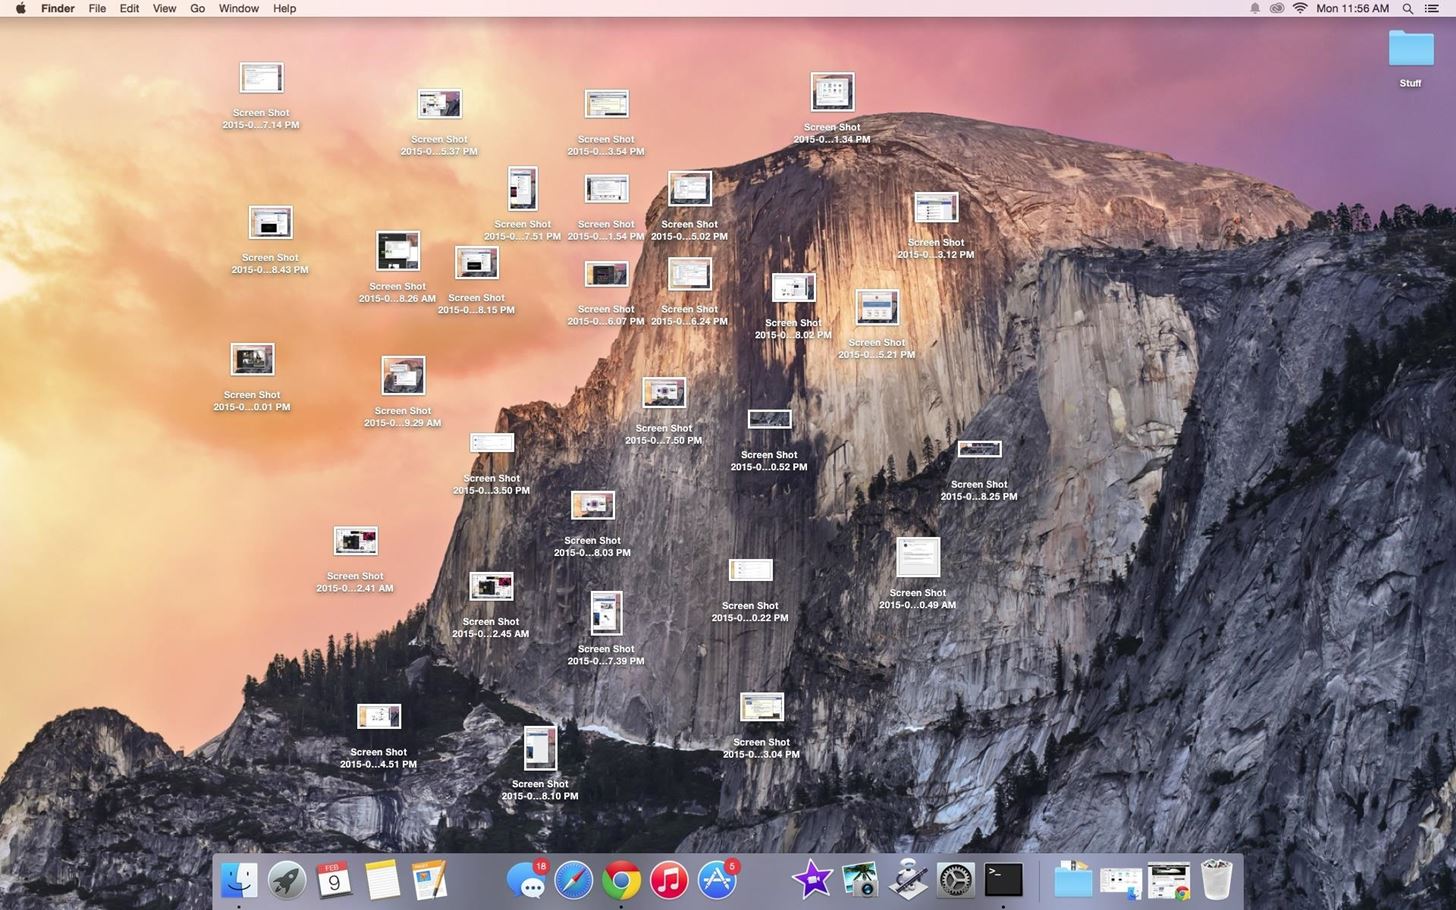
If you are coming to macOS from a distinct working system (like Windows or Linux), it would really feel odd that, by default, macOS saves screenshots within the Desktop folder. This make the desktop look messy after some time should you take lots of screenshots!
But it would not look messy should you create a particular listing for saving all of the screenshots and your MacBook saves all of the screenshots there routinely.
Configuring the settings might sound difficult for brand new MacBook customers. So I’ll present you the way you are able to do this inside a couple of minutes with this step-by-step information.
Keep in thoughts that though I’m selecting the Pictures/Screenshots listing as my particular listing for saving all my screenshots, you’ll be able to select any listing you need.
For this text, I’m utilizing my newly bought MacBook M1 Air (8/256) which is at the moment working on macOS Sonoma 14.4.1. But the identical process is relevant for all the newest macOS variations as properly.
How to Choose a Different Location
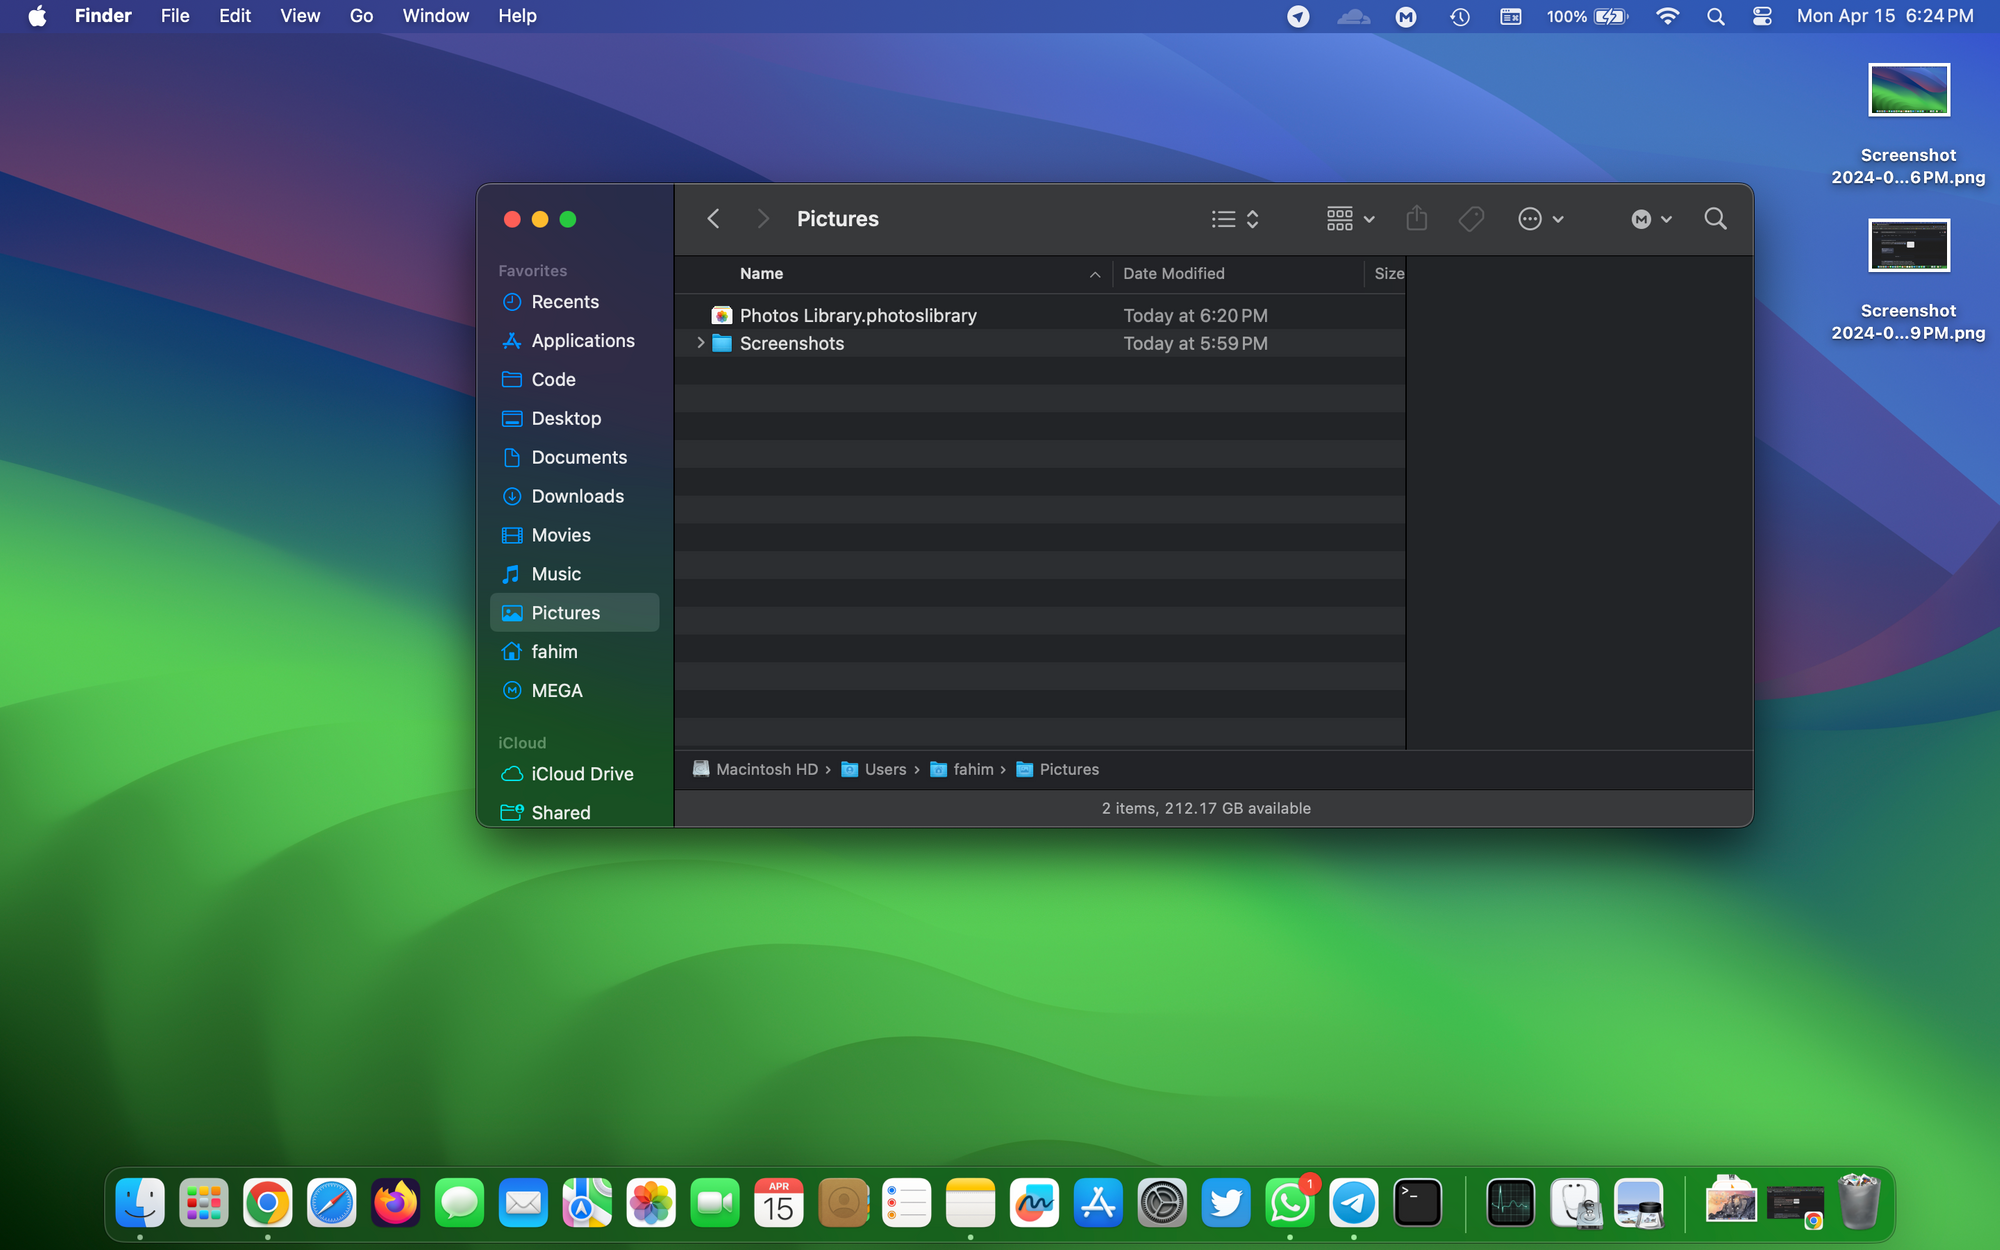
Firstly, you’ll want to choose a particular location the place you need to save all of the screenshots straight.
In my case, I created a separate folder for saving screenshots inside my “Pictures” listing.
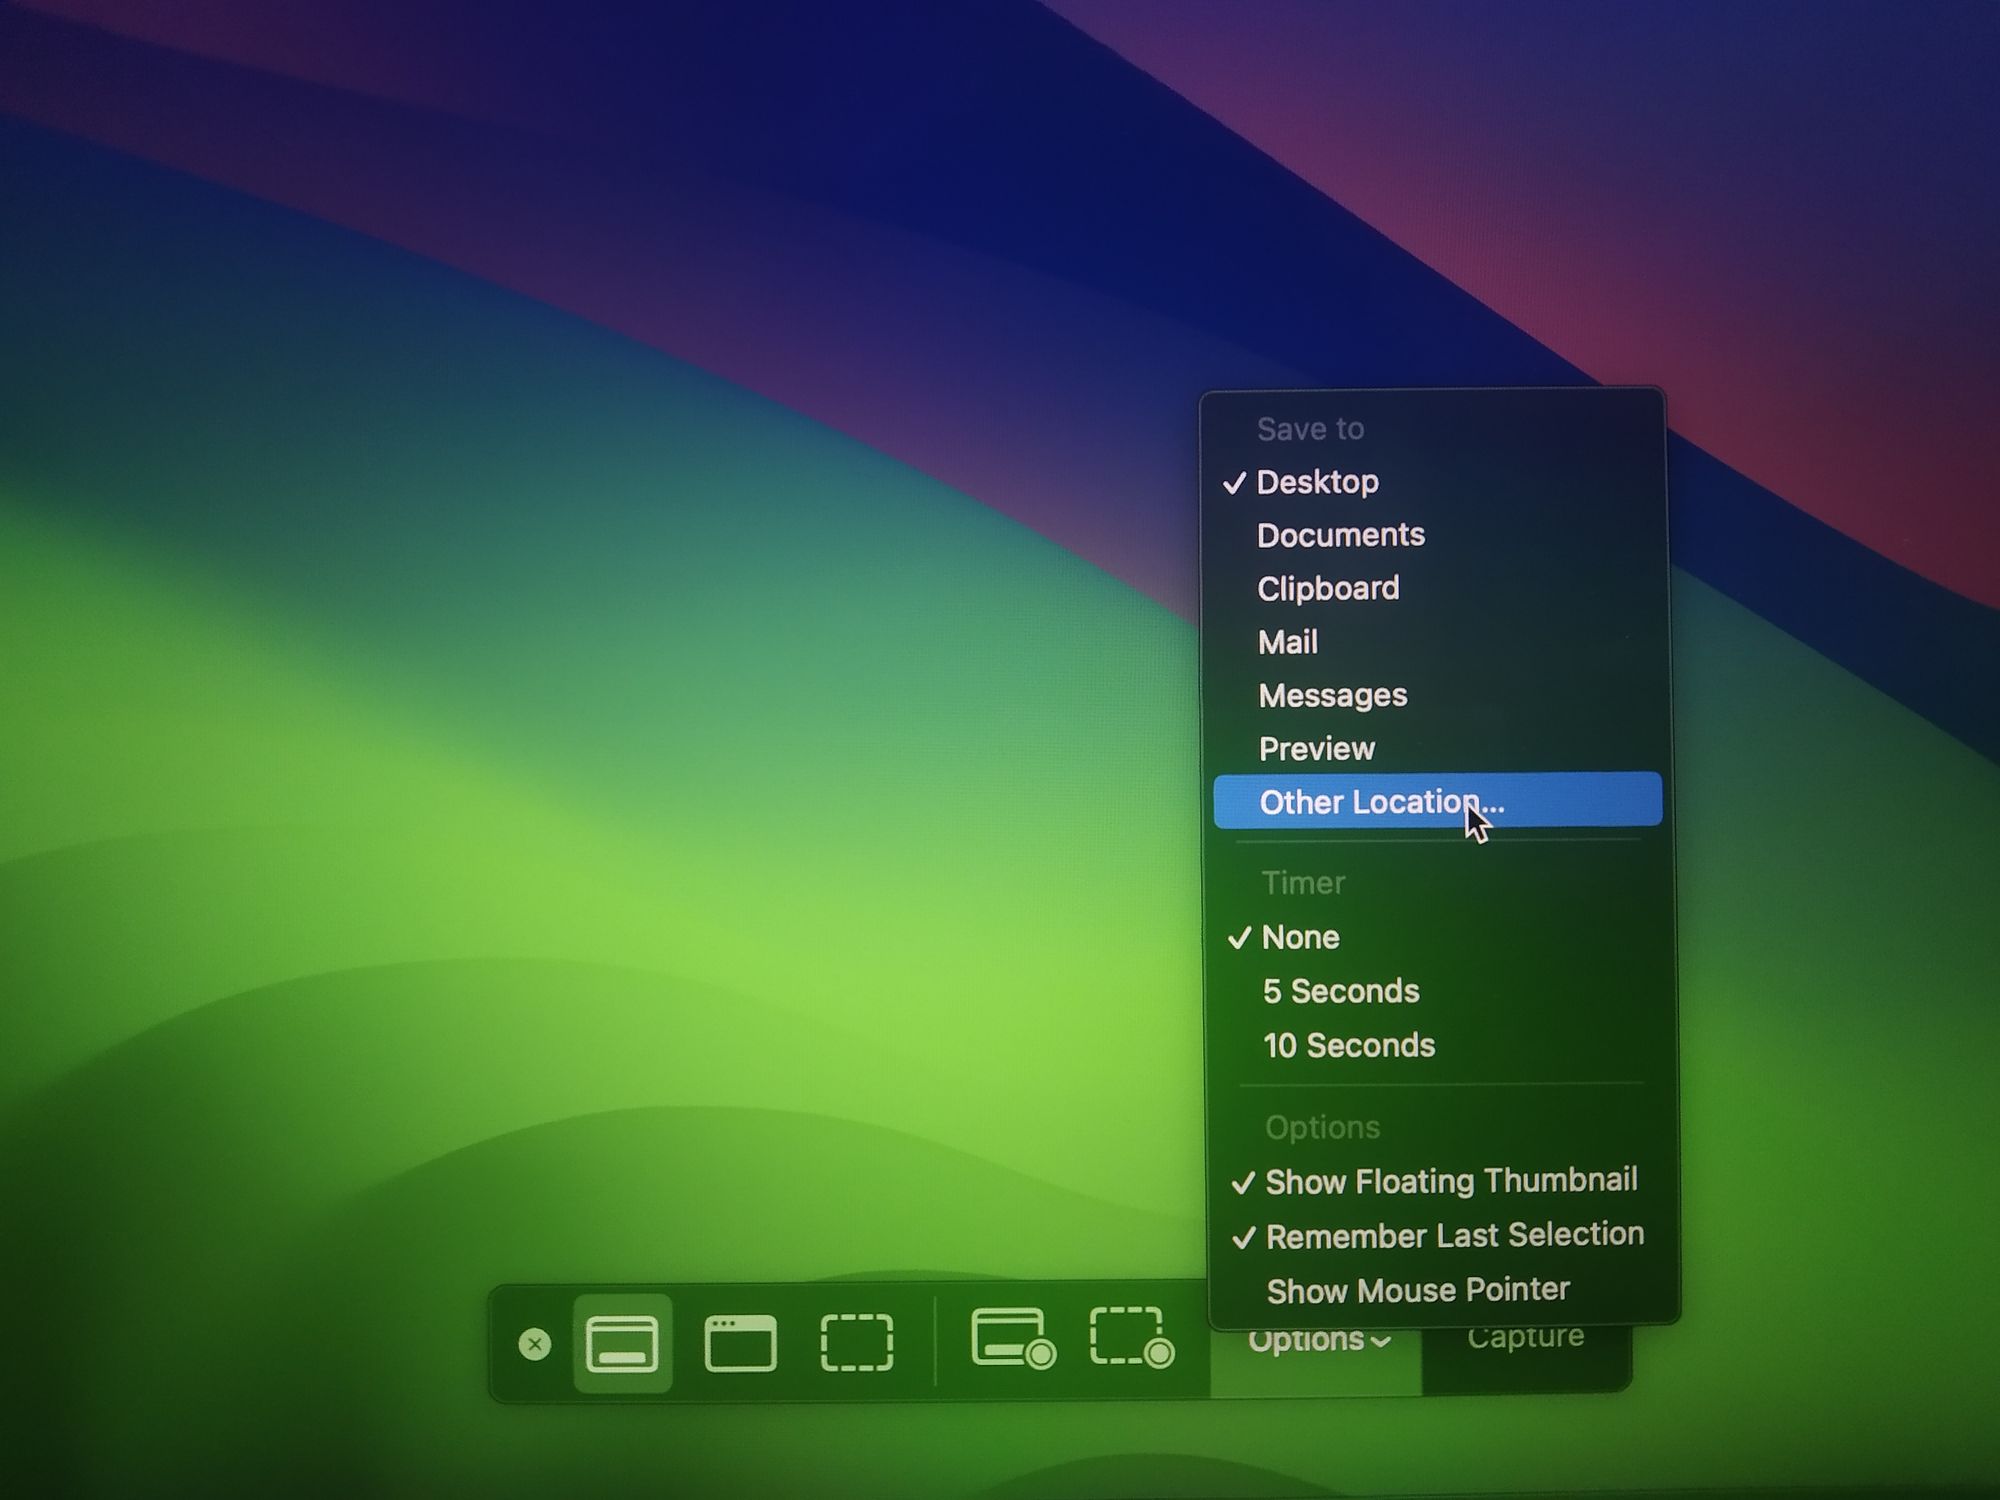
Now we have to configure the default screenshot device on macOS in order that it routinely saves the screenshot photos to our desired location. Here’s how you are able to do that:
- Use
Shift+Command+Sto open the screenshot device. - Click on “Options”. Then click on “Other Location…”.
- Select that particular location that you just created earlier.
- Now click on “Ok”, or “Open”, or no matter it says to verify that new location.
That’s it! From now on, everytime you use the default screenshot device, it should routinely save all of the screenshots in that newly specified location. This will assist your desktop stay litter free!
Screenshot Shortcut
There are many individuals who nonetheless open the Screenshot device utilizing Spotlight or the launchpad. But there’s a devoted shortcut key for that!
You can use Shift + Command + 3 to take screenshot straight and save your self a bit time.
Conclusion
I hope you’ve gotten realized one thing new from this text.
If you’ve gotten loved the procedures step-by-step, then do not forget to let me know on Twitter/X or LinkedIn. I might respect it should you may endorse me for some related skillsets on LinkedIn.
You can observe me on GitHub as properly in case you are considering open supply. Make certain to verify my web site (https://fahimbinamin.com/) as properly.
Thank you a lot! 😀
Cover picture: Photo by Iewek Gnos on Unsplash