Although signing in with a Microsoft account makes it simpler to entry extra advantages, equivalent to the power to sync settings, preferences, and recordsdata throughout units with out extra configuration on Windows 10, you continue to must configure entry manually for apps and providers utilizing a special account.
However, if you happen to use a number of providers with completely different accounts, the Settings app helps you to add them forward of time permitting apps simpler and quicker entry to your providers.
This how-to information will stroll you thru the steps so as to add and take away accounts out of your laptop.
Important: These directions are supposed to embody extra accounts to your Windows 10 profile. If you are trying so as to add a brand new person account, you might want to use these directions.
How so as to add emails and accounts from Settings
To preload accounts for the Mail, Calendar, and different apps on Windows 10, you’ve got two decisions.
Add new account for emails
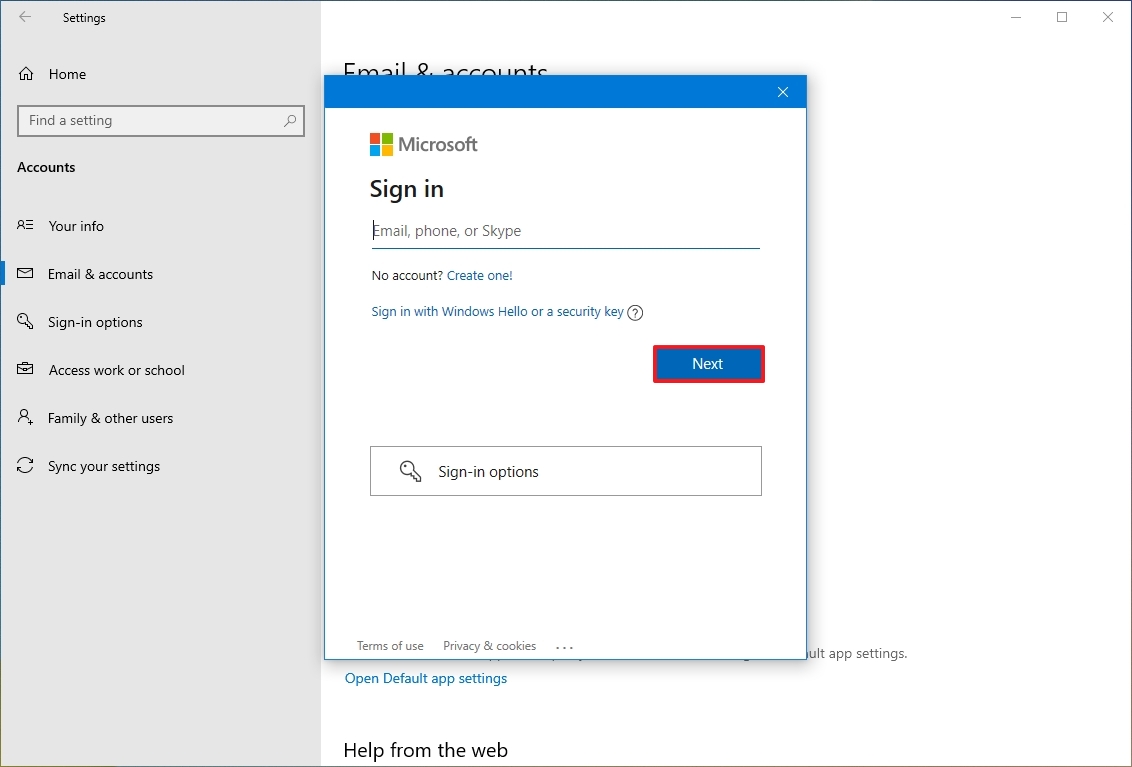
To add an account for emails and apps on Windows 10, use these steps:
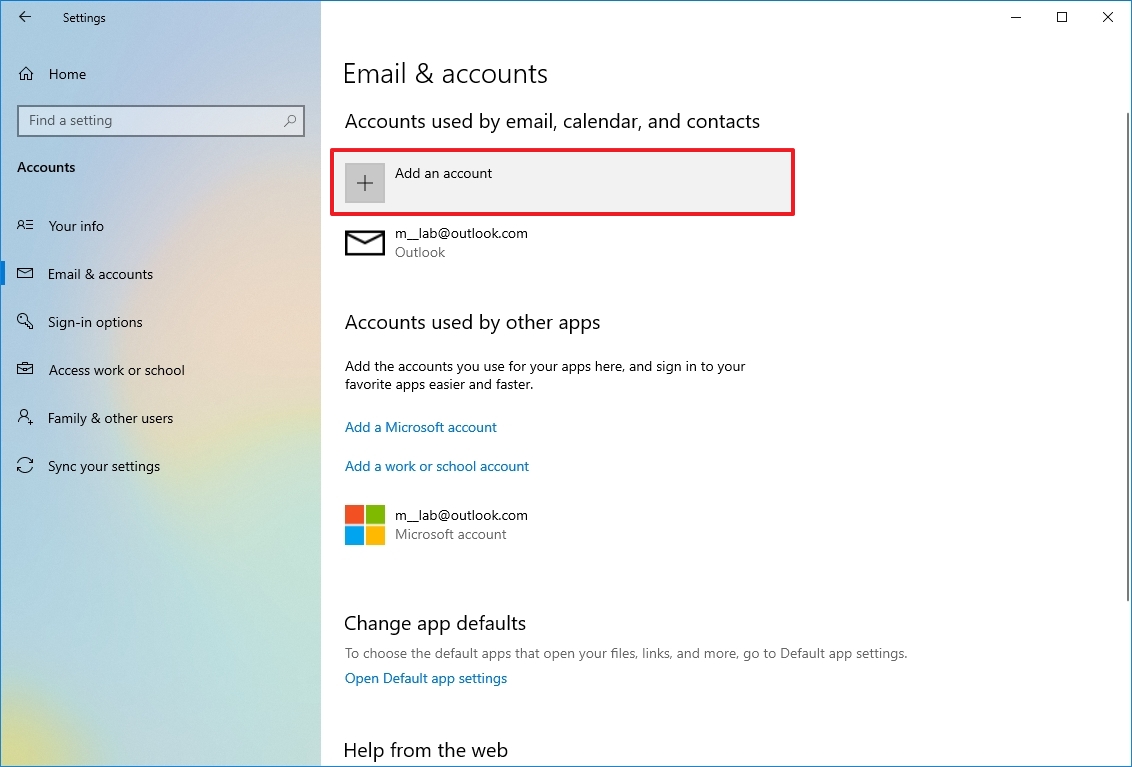
- Open Settings.
- Click on Accounts.
- Click on Email & accounts.
- Click the “Add an account” button to incorporate a brand new e-mail account to permit the Mail and Calendar apps to entry your emails and calendar.
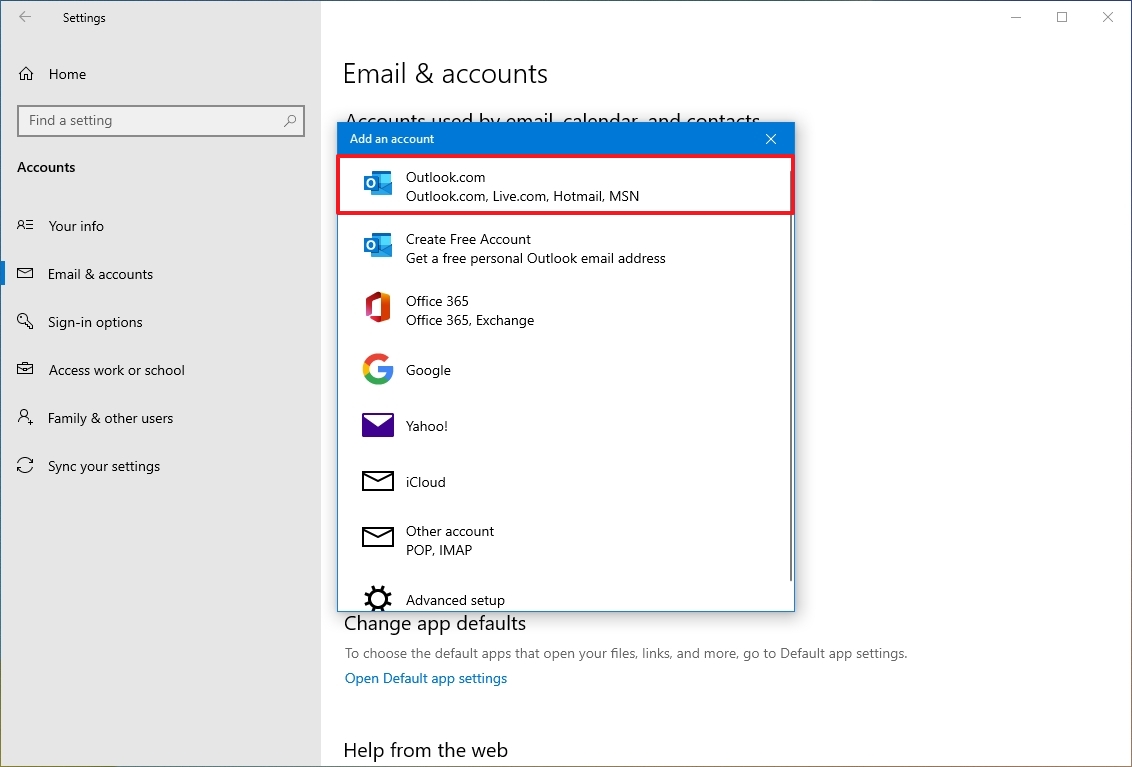
- Select the service supplier — for instance, Outlook.com.
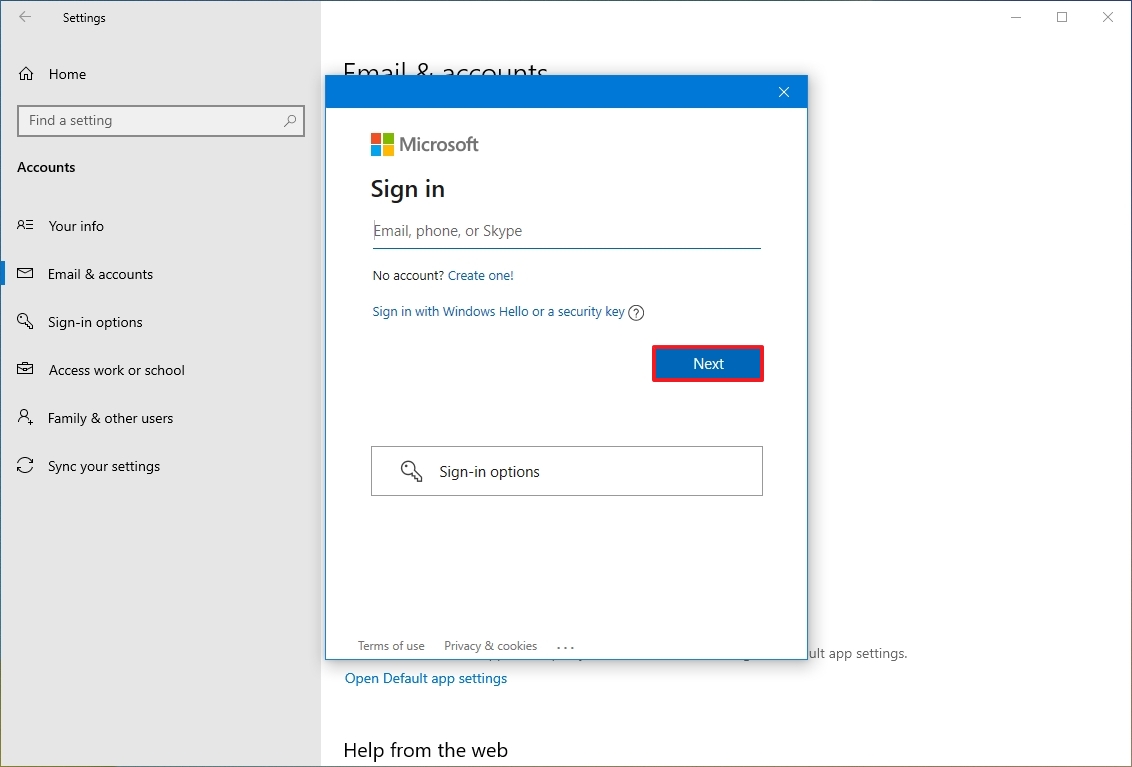
- Confirm the e-mail account info.
- Click the Next button.
- Confirm the account password.
- Click the Sign-in button.
- Click the OK button.
- Click the Done button.
Once you full the steps, the brand new account will probably be added to your system to entry your e-mail, calendar, and contacts. If you add a Microsoft account, the data can even be obtainable to register to different apps. (This possibility is like including an account instantly into the Mail app.)
Add additional Microsoft accounts for apps
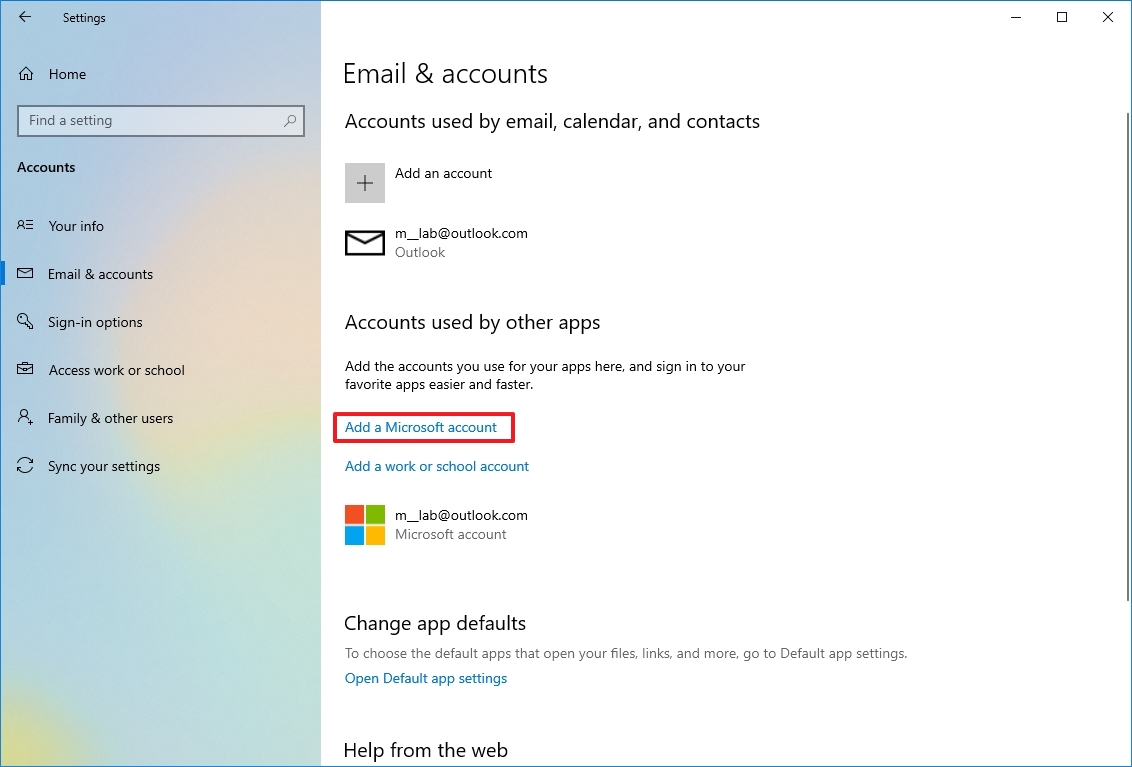
If you utilize apps with a special Microsoft account (equivalent to for OneDrive, Xbox, and others), you possibly can preload these credentials for simpler entry with these steps:
- Open Settings.
- Click on Accounts.
- Click on Email & accounts.
- Under the “Accounts utilized by different apps” part, click on the “Add a Microsoft account” possibility.
- Confirm your Microsoft account info.
- Click the Next button.
- Confirm the account password.
- Click the Sign-in button.
- Click the OK button.
- Click the Done button.
After finishing the steps, the account info will probably be obtainable for apps to register robotically. (You might must repeat the steps so as to add extra accounts.)
Manage accounts for apps
Windows 10 will use the data to signal you into providers robotically when including accounts for different apps. However, you possibly can change the settings to ask for permission earlier than utilizing your credentials.
To handle a special Microsoft account for apps on Windows 10, use these steps:
- Open Settings.
- Click on Accounts.
- Click on Email & accounts.
- Select the account that you just wish to change.
- Use the drop-down menu, and choose the “Apps must ask me to make use of this account” possibility.
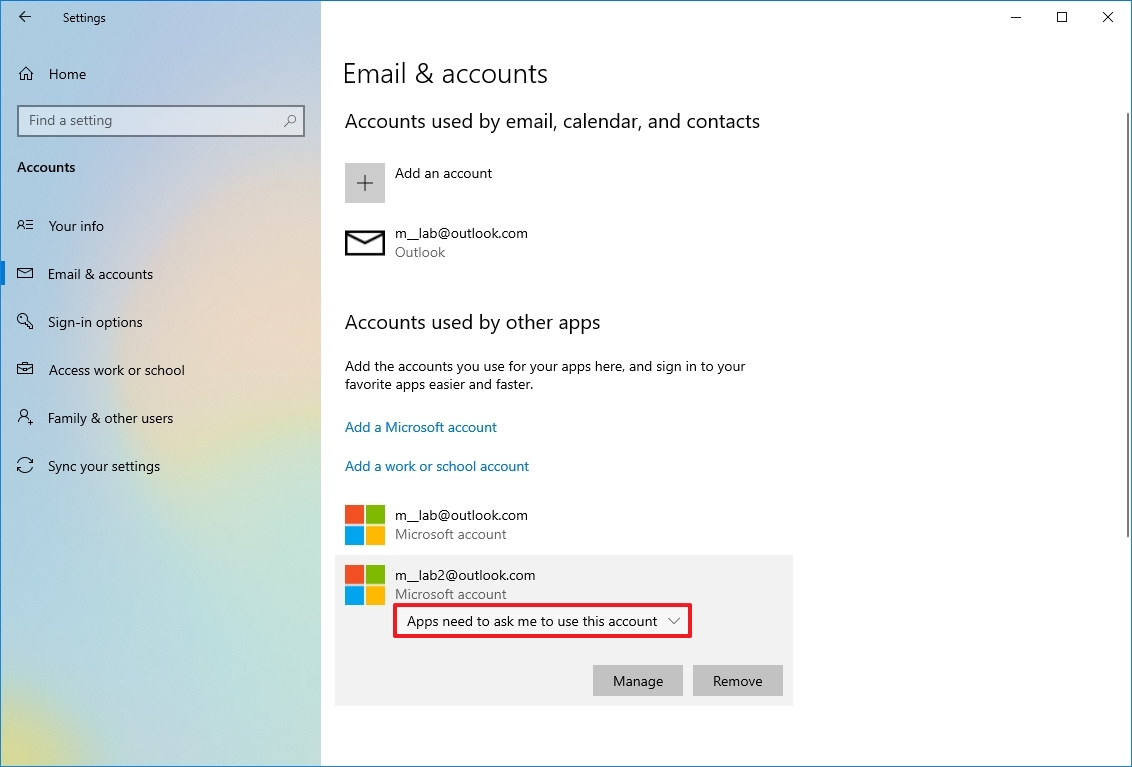
After you full the steps, apps will immediate you to permit entry earlier than signing in to the service.
How to take away emails and accounts from Settings
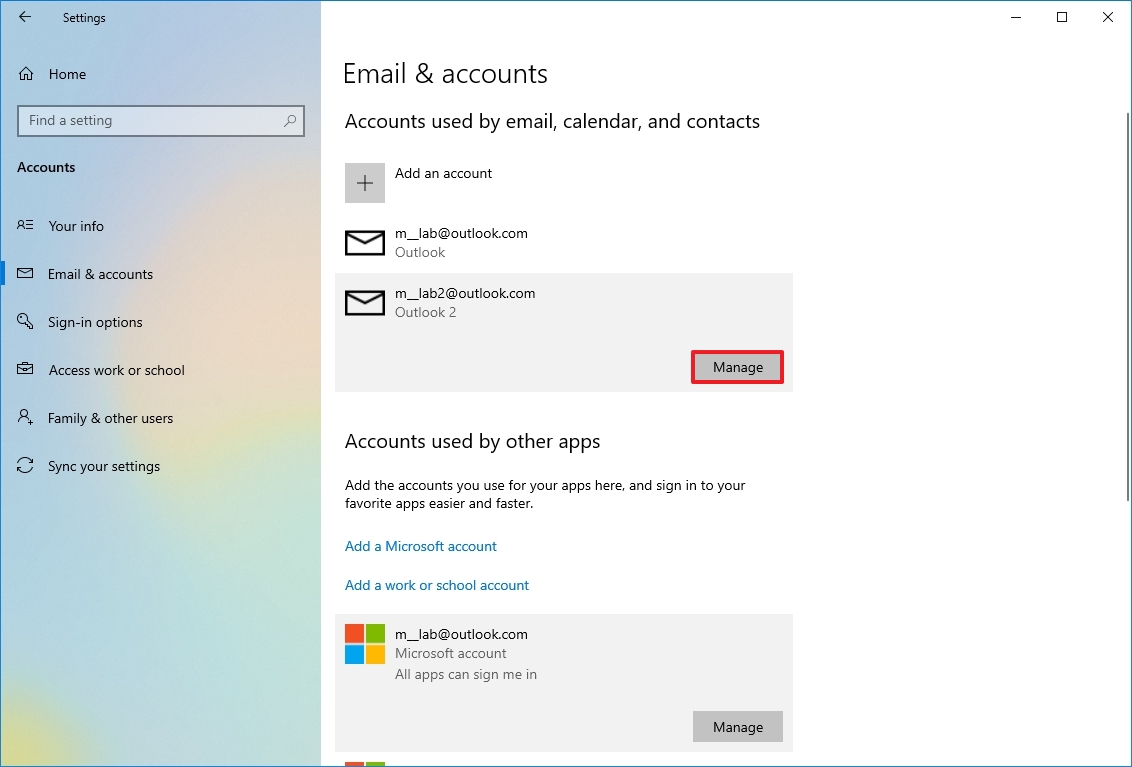
If you not want the account, you possibly can take away it from Settings utilizing these steps:
- Open Settings.
- Click on Accounts.
- Click on Email & accounts.
- Select the account to take away.
- Click the Manage button.
- Click the “Delete account from this system” possibility.
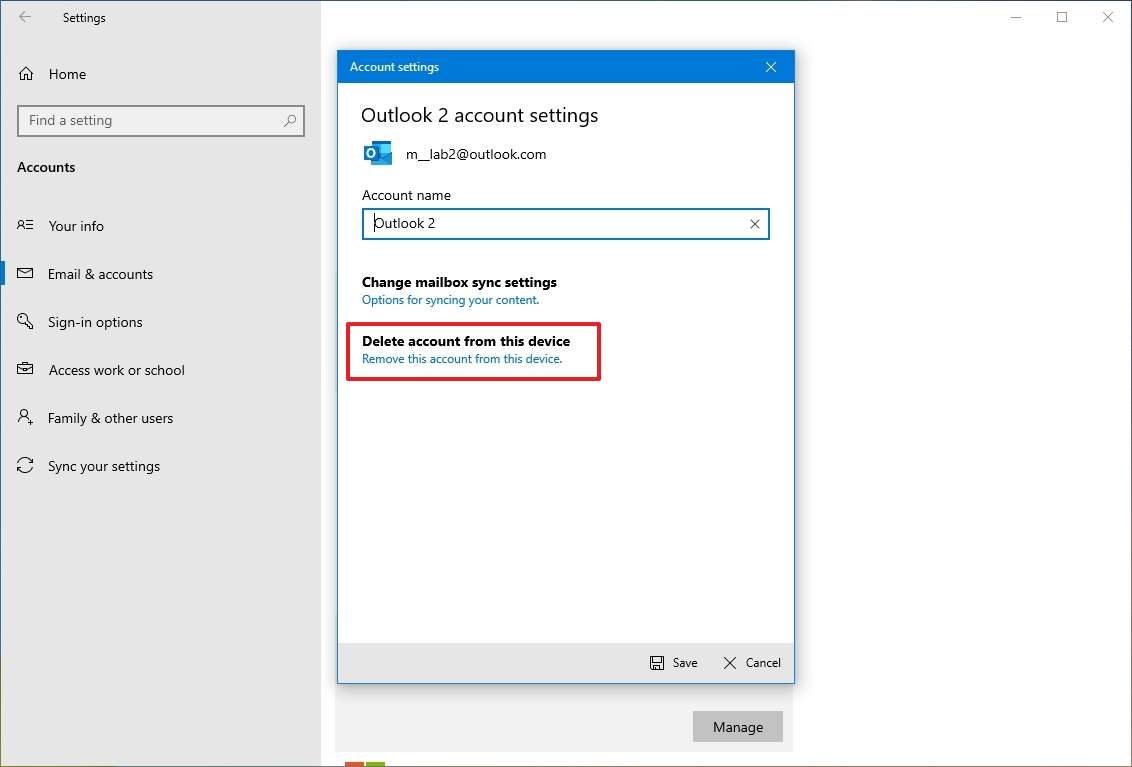
- Click the Delete button.
- Click the Done button.
Once you full the steps, the account info will solely be faraway from the Mail and Calendar apps. If you wish to take away a Microsoft account info utterly, you additionally must delete the info from the “Accounts utilized by different apps” part with the steps under.
Removing accounts for apps
If you might want to take away an account for apps, use these steps:
- Open Settings.
- Click on Accounts.
- Click on Email & accounts.
- Under the “Accounts utilized by different apps” part, choose the account you intend to take away.
- Click the Remove button.
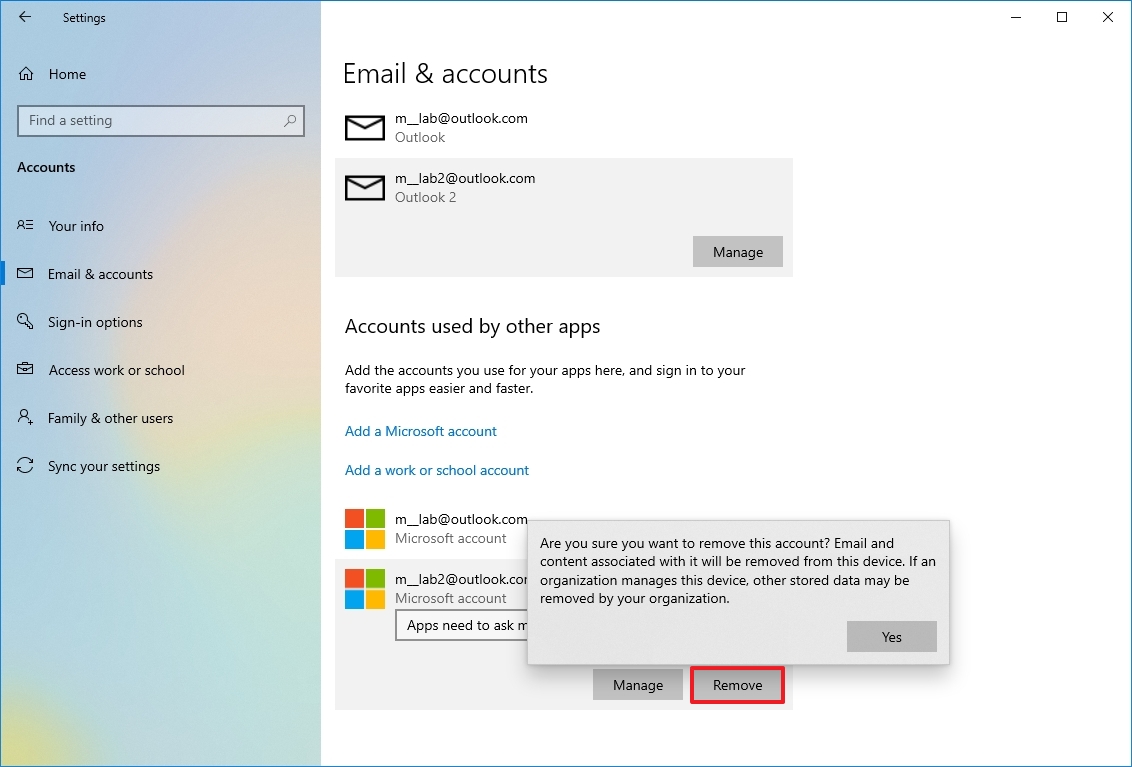
- Click the Yes button.
After you full the steps, the account info will not be obtainable on Windows 10.
More sources
For extra useful articles, protection, and solutions to widespread questions on Windows 10 and Windows 11, go to the next sources:

Cutting-edge working system
A refreshed design in Windows 11 lets you do what you need effortlessly and safely, with biometric logins for encrypted authentication and superior antivirus defenses.