
You might wish to host your web site on a digital non-public server or a digital machine like AWS EC2. But it may be a problem to attach a site identify that you just bought from suppliers like Namecheap or Godaddy.
But if the steps to observe, this does not should be tough.
In this put up, I’ll break the entire technique of connecting a site identify to an internet site hosted on EC2 down. I’ll present you do it virtually with screenshots guiding you thru each step. I’ll be utilizing a Namecheap area on this instance.
There are 4 main steps that you will have to observe, and it should not be too tough should you observe the dialogue on this tutorial. Here they’re:
Let’s get began.
Step 1: How to Set Up Your Website on EC2
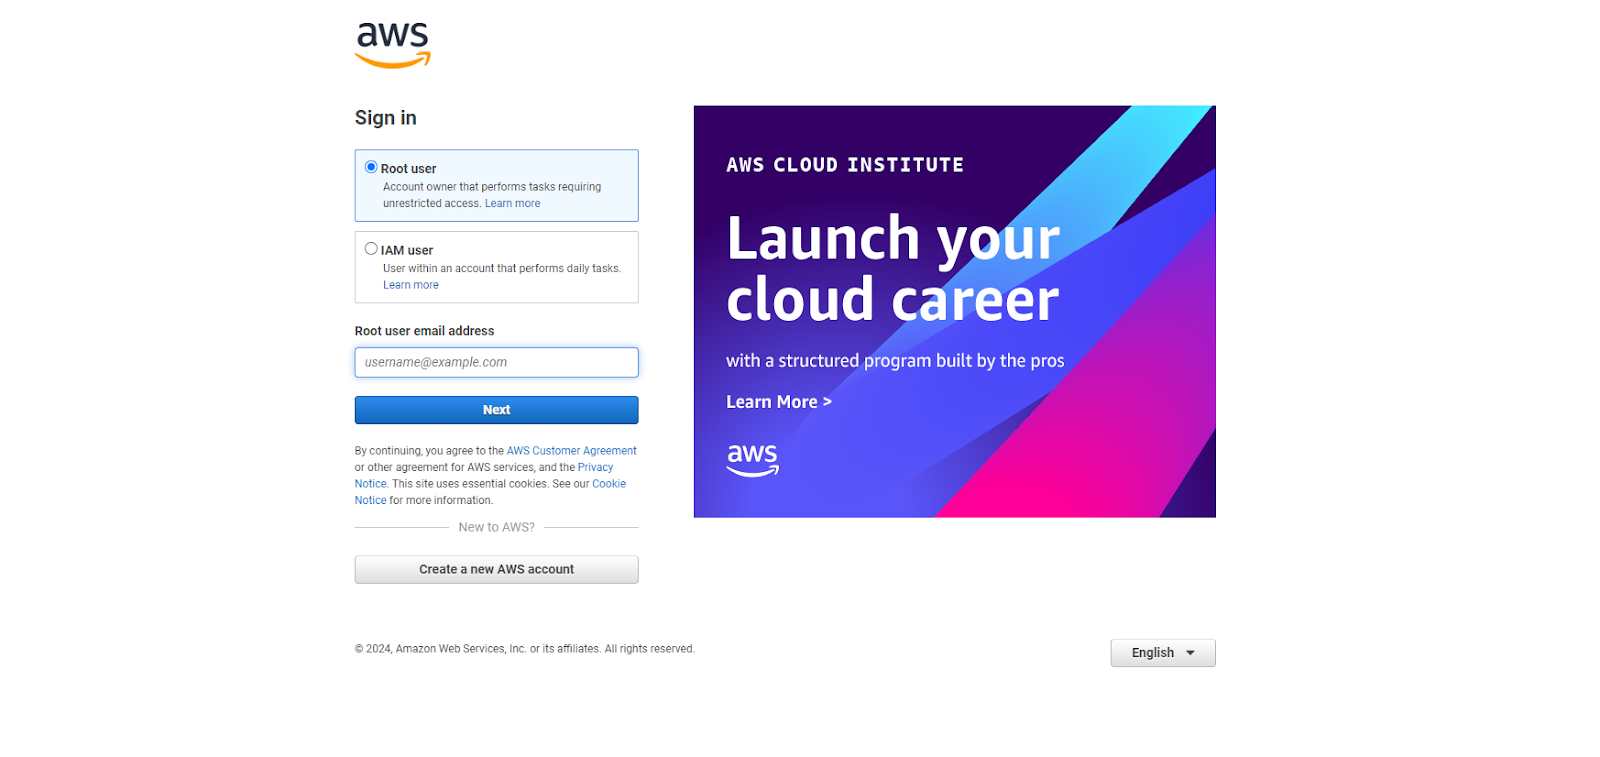
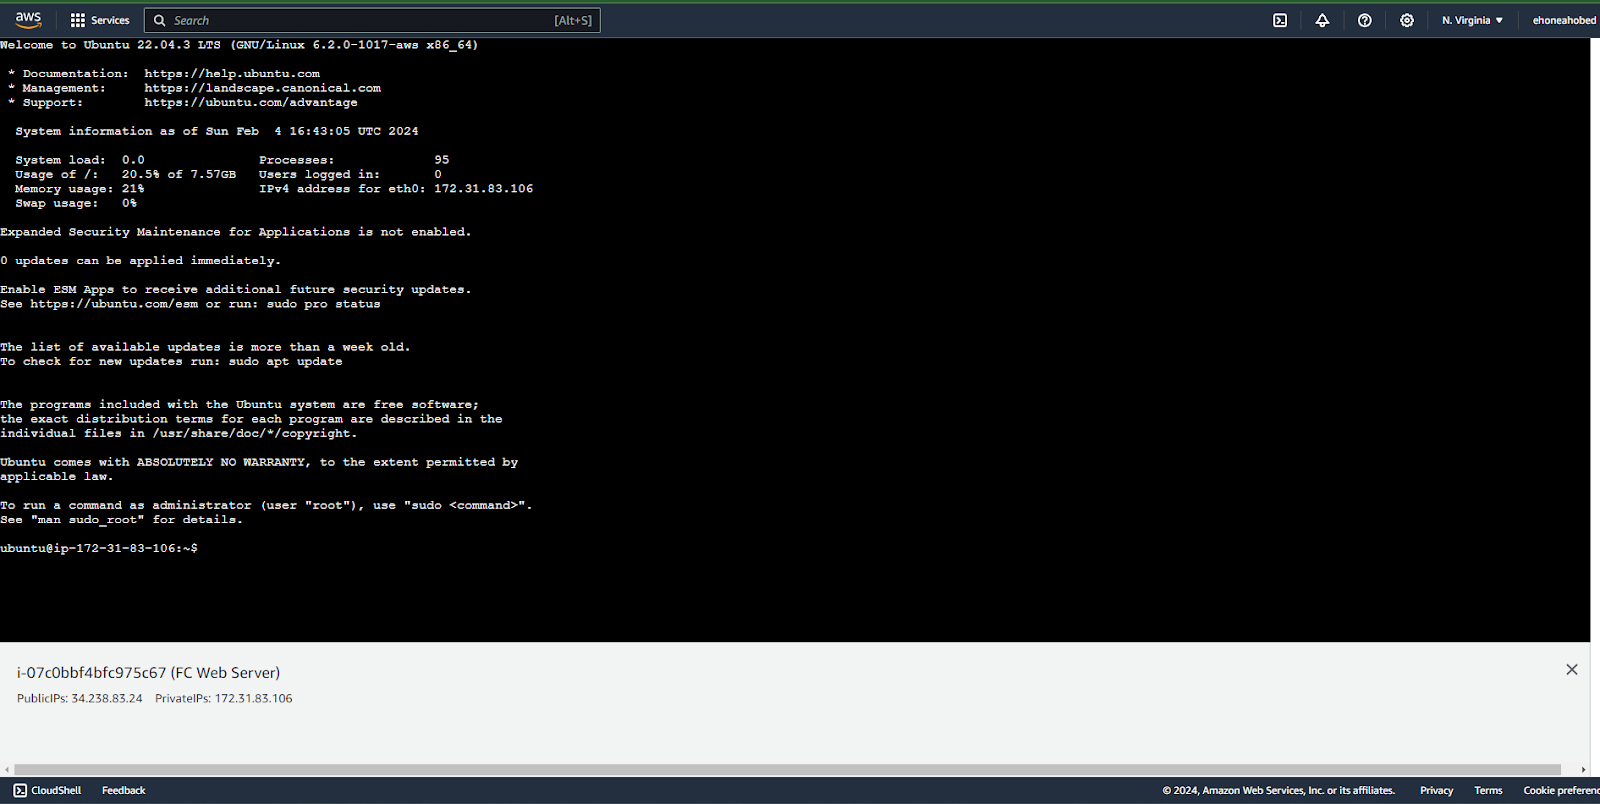
First, go to https://aws.amazon.com/console/. Click on the check in button on the high proper nook or the Log again in button within the center.

Create an account should you don’t have already got one. Otherwise check in together with your credentials.
After logging in, you’ll be redirected to the principle dashboard.
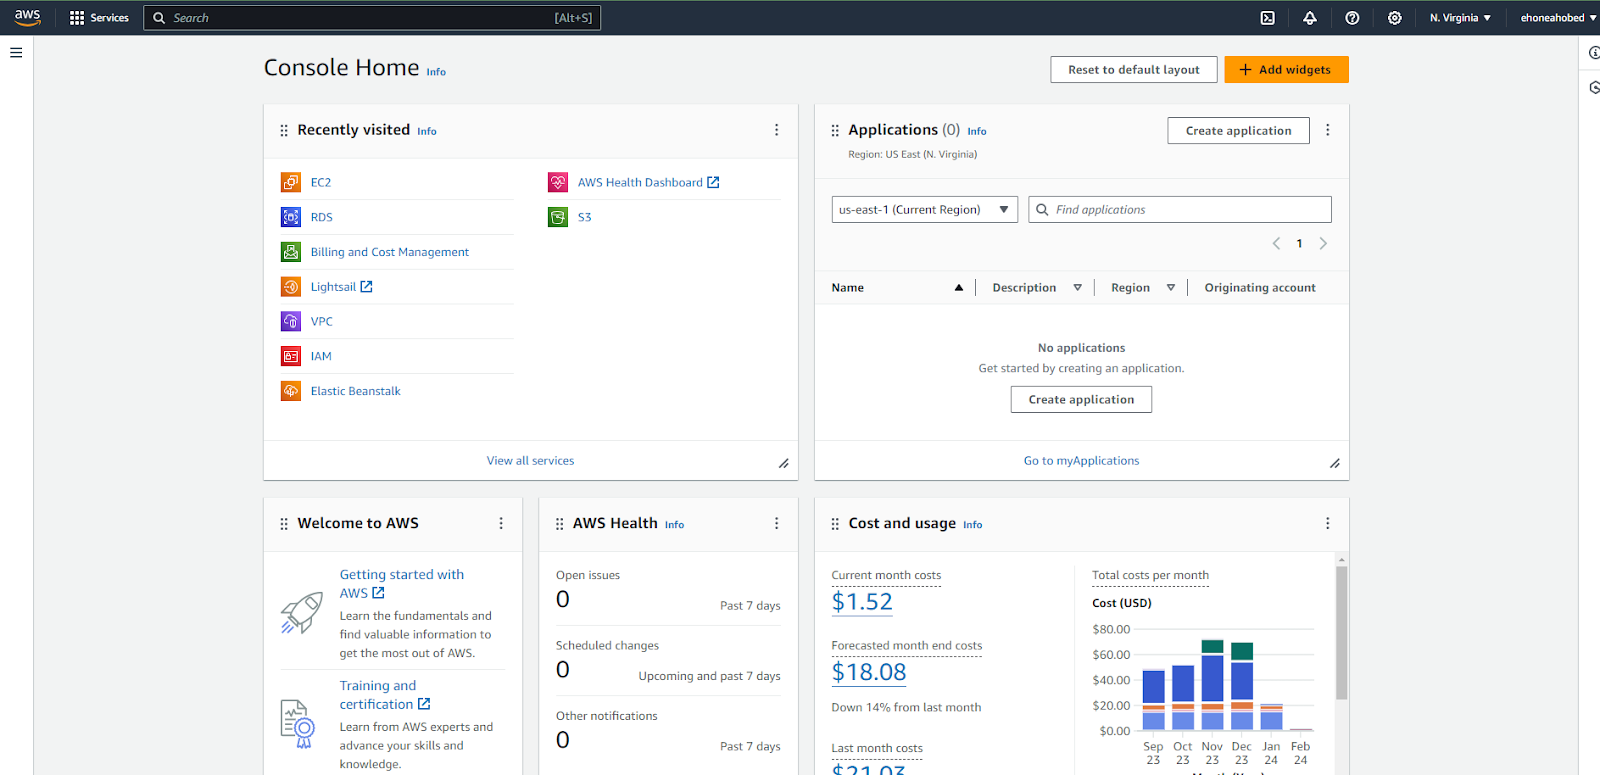
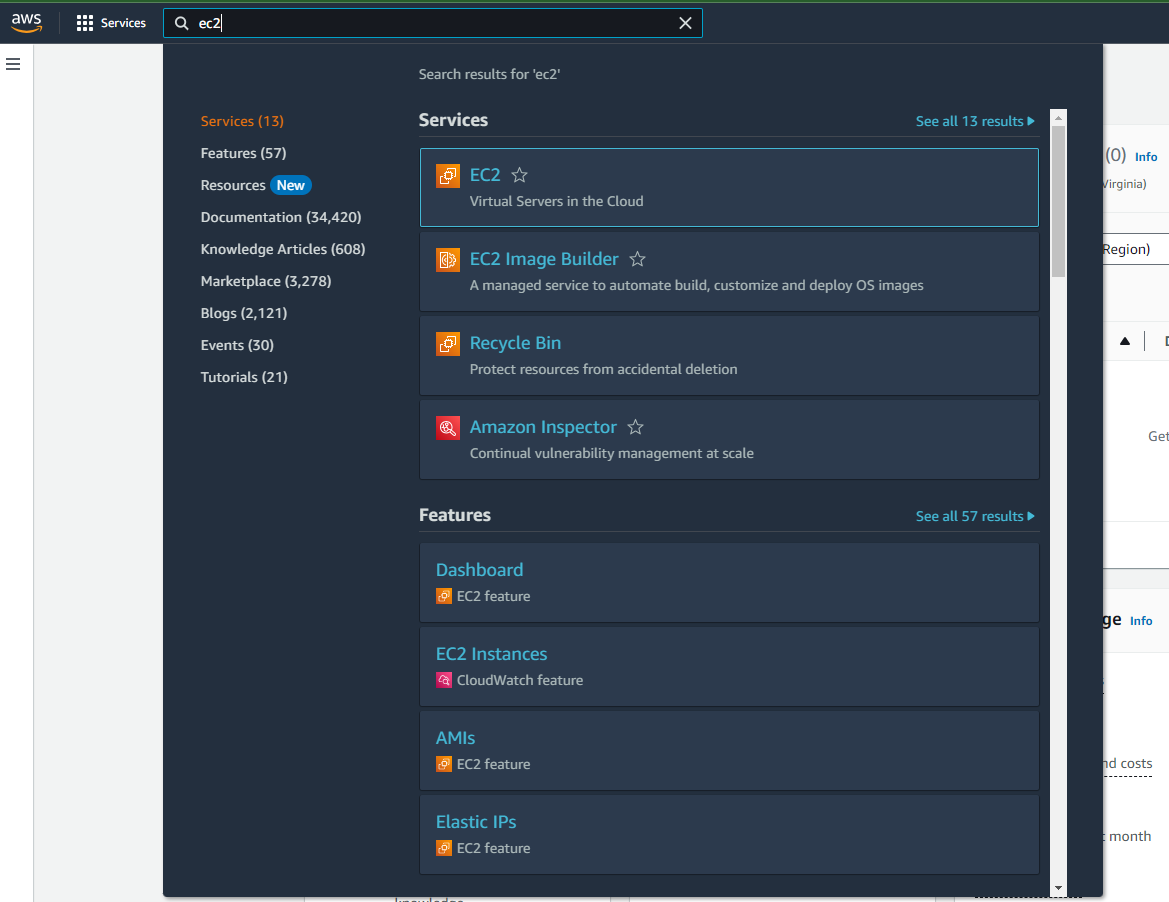
In the search bar on the very high, you may seek for EC2 and click on on the primary possibility below Services.
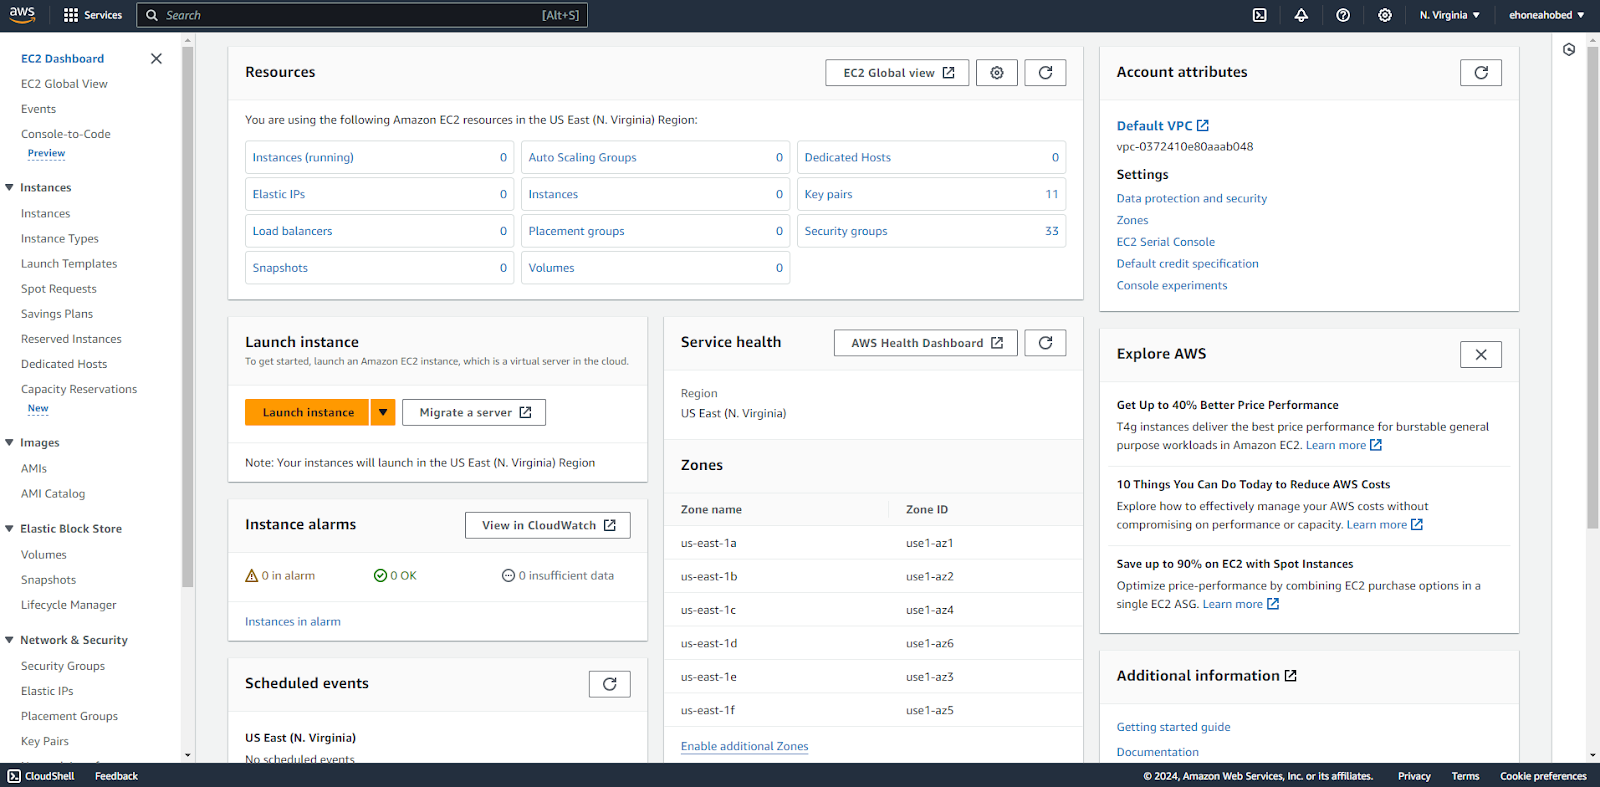
This will then open the EC2 dashboard that provides you a abstract of all of the EC2 sources that you’re utilizing. If you aren’t utilizing any of them, then you’re more likely to discover that the worth for every will likely be zero.
Launching an EC2 occasion
Click on the Launch Instance button.
On the “Launch an occasion” web page, you’ll choose the specs for the digital machine meant to host your web site or internet utility. Initially, assign a reputation to your machine for straightforward identification..
For the sake of this instance, I used the identify “FC Web Server”.

Choose the Amazon Machine Image (AMI) which represents the precise working system and purposes you wish to have by default in your digital machine if you boot it.
For the sake of this instance, I chosen Ubuntu, and I’m utilizing the Free tier eligible Ubuntu Server 22.04 LTS because the AMI. I left the structure at 64-bit (x86).
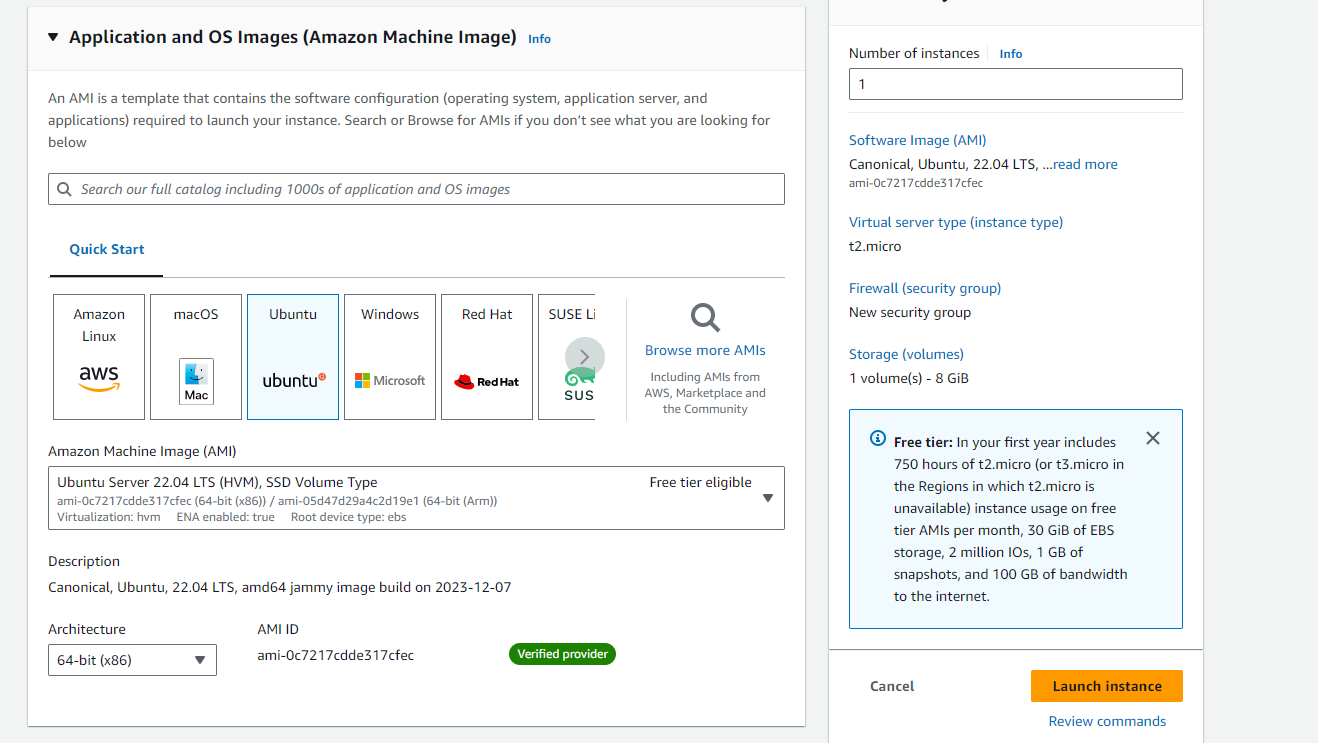
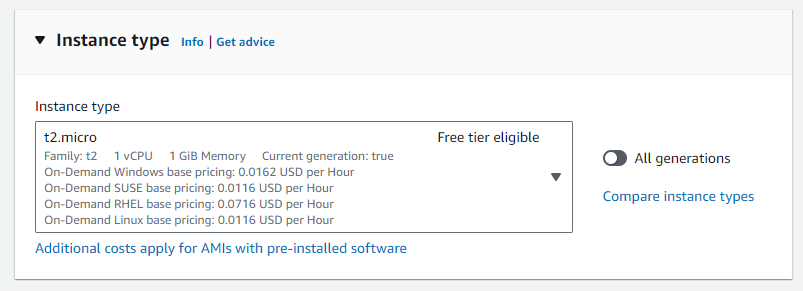
For the occasion sort, you can too follow the Free tier eligible t2.micro – but when your app or web site requires extra sources, then you definately’ll have to decide on essentially the most applicable occasion primarily based on the variety of vCPU and reminiscence required.
To securely connect with your digital machine, you will have an SSH key pair. Go forward and click on on the Create new key pair hyperlink below the Key pair part should you don’t have already got an present key pair that you need to use.
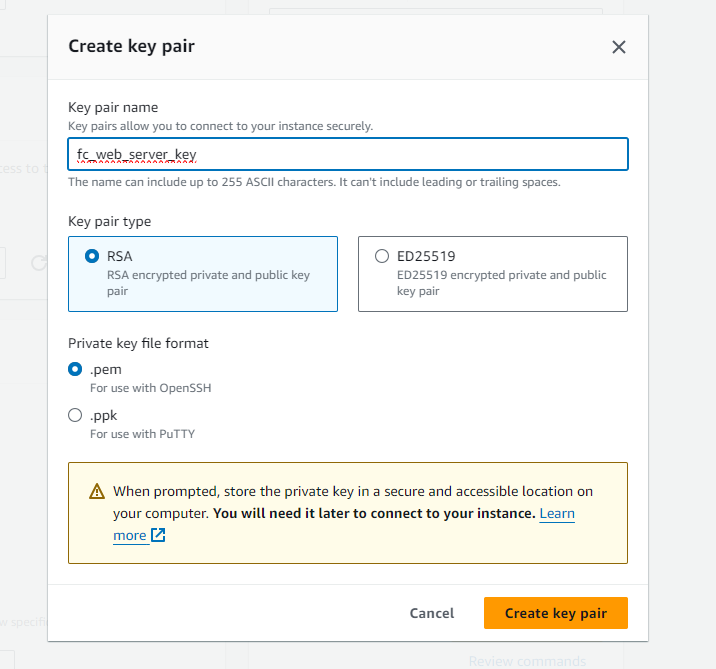
Give your key pair a reputation you can simply establish. Set the important thing pair sort to RSA and the non-public key file format to .pem. You can even use .ppk in case you are in a home windows surroundings and know use PuTTY.
Click the Create key pair button. After clicking it, the file will mechanically be downloaded. Make positive you retain this file in a secured place.
Move on to the Network settings. You have to arrange a firewall that controls the varied protocols by way of which your web site or internet app may be accessed. For the sake of this instance, you may select Create safety group and permit SSH, HTTPS, and HTTP.
You can depart the IP deal with at Anywhere 0.0.0.0/0.
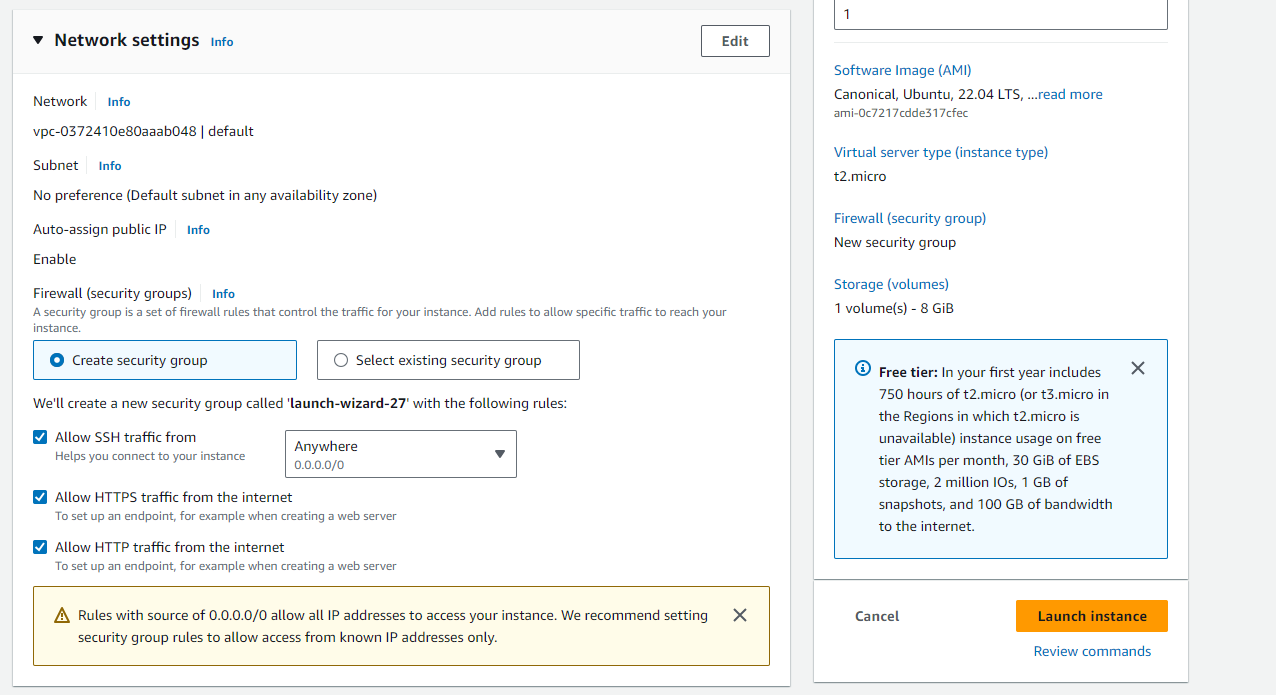
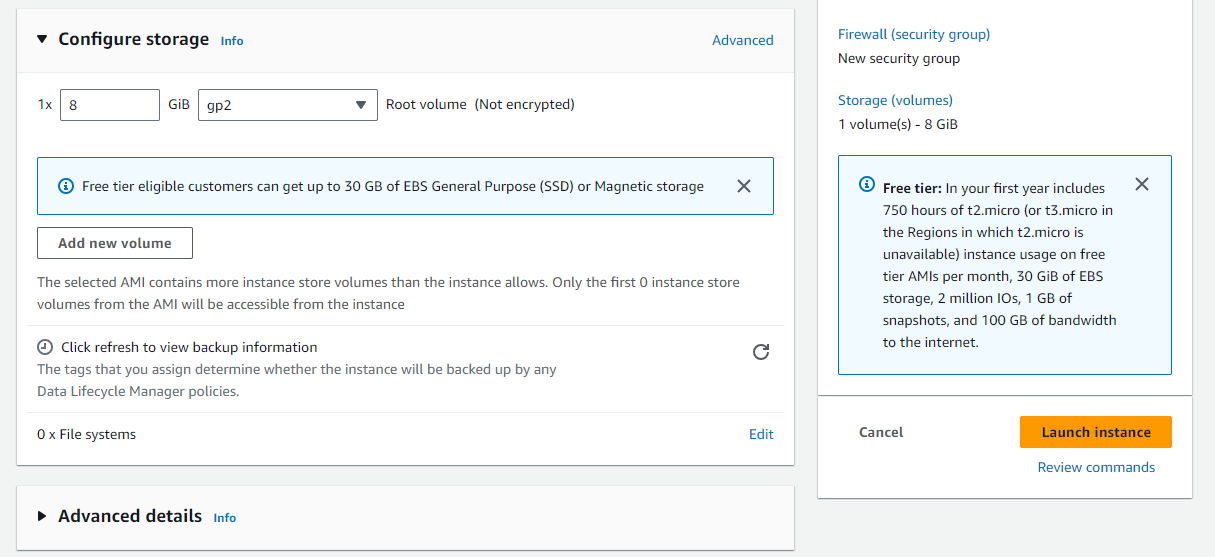
Finally, it’s essential to configure the storage choices. You can even go along with the default 8GiB gp2. You can ignore the extra particulars and click on on the Launch occasion button.
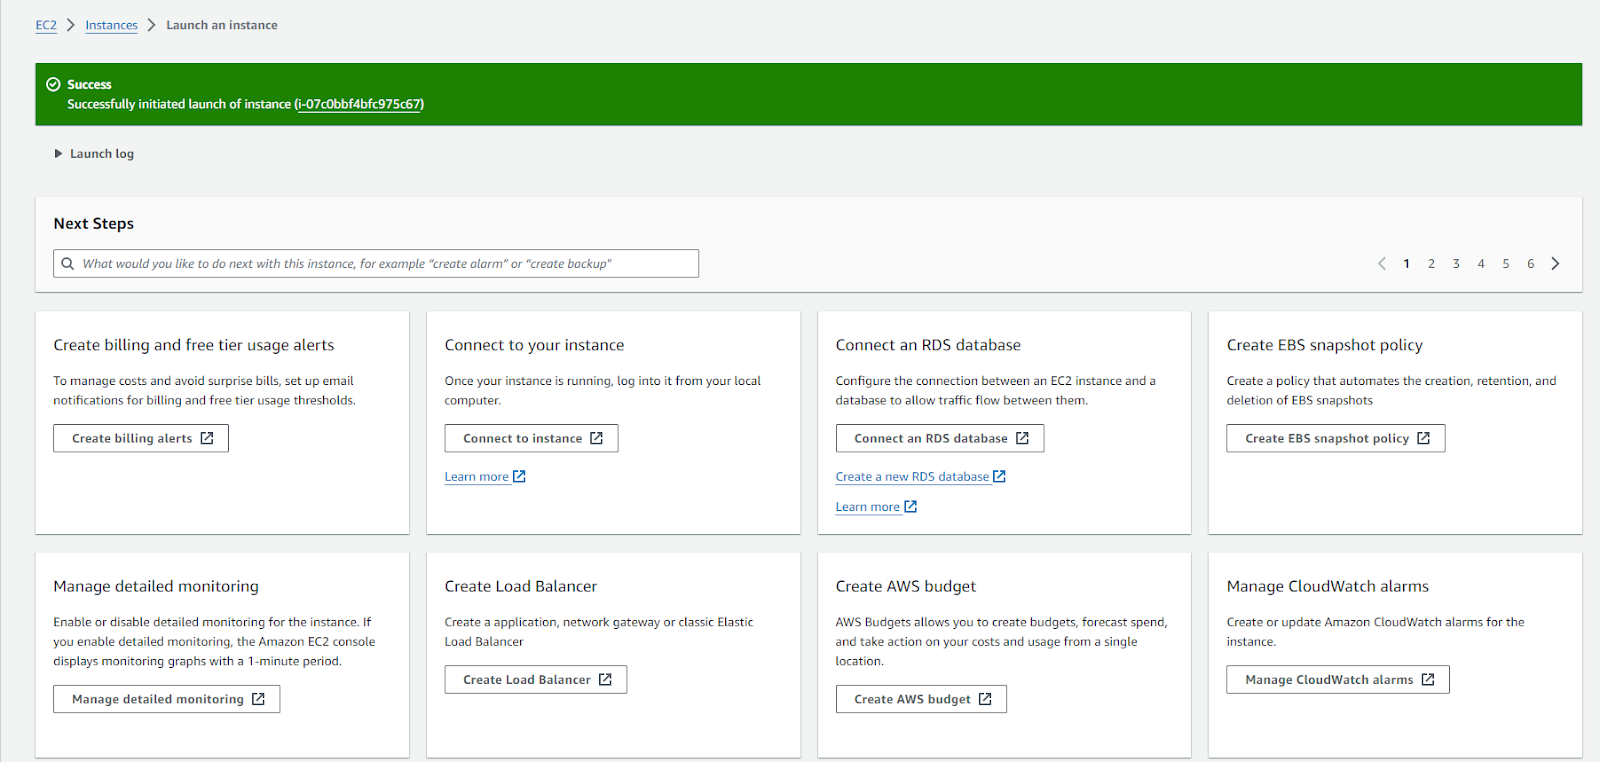
After the occasion has efficiently be launched, you’ll get successful message.
Connecting to an EC2 occasion
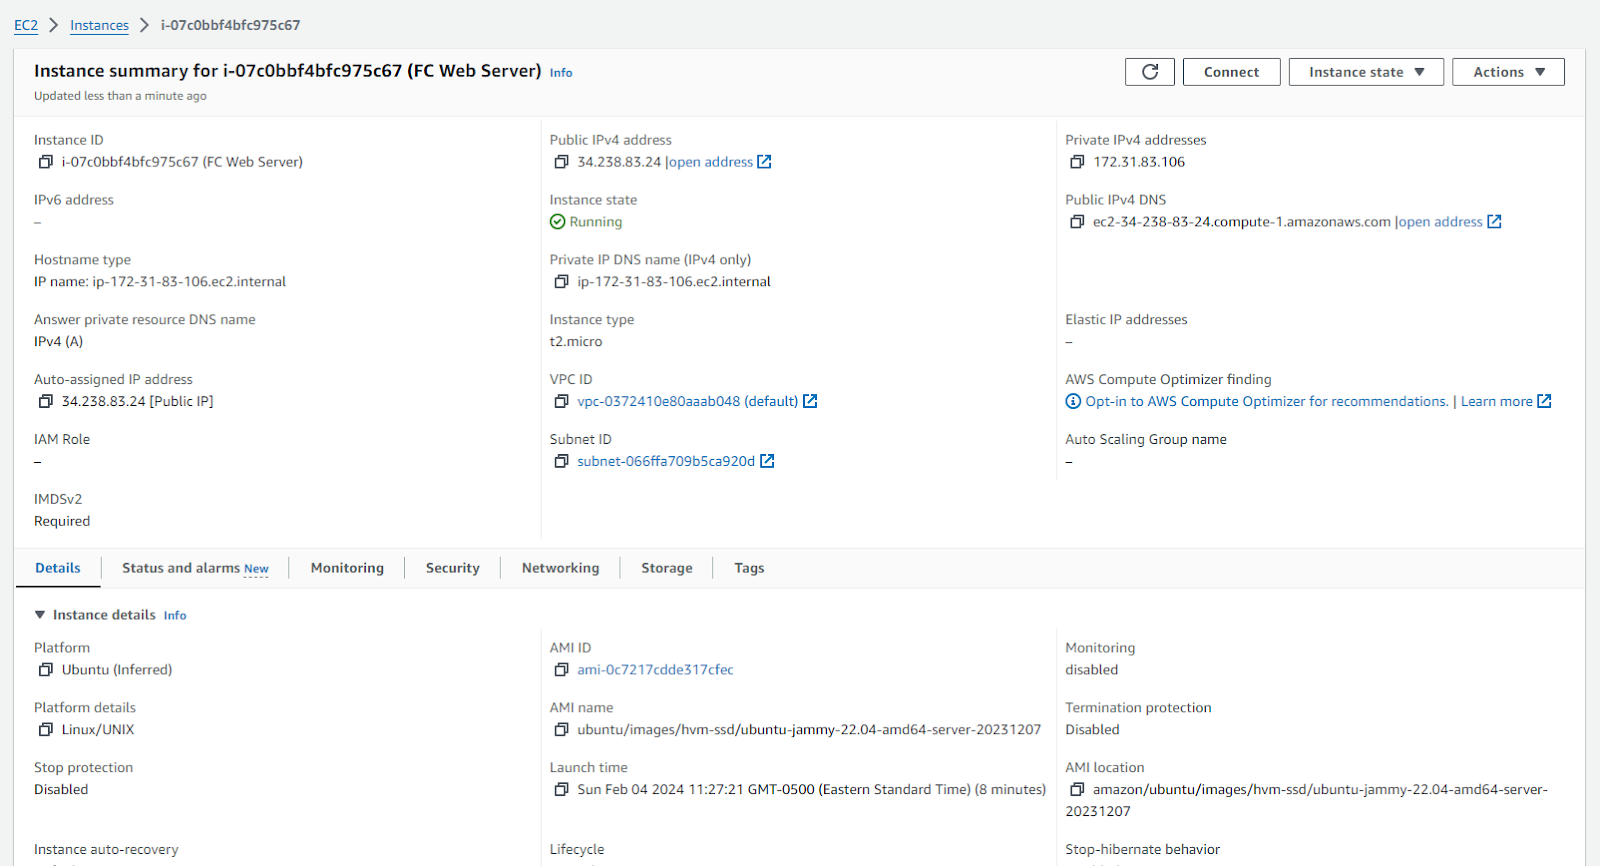
You’ve now created your digital machine – so it’s essential to connect with it and switch it on. You can do that by clicking on the Connect to occasion. You can even click on on View all situations to see the occasion that you just created.
If you click on on view all situations, it’ll take you to this web page the place you see your occasion (see beneath). If you might have just one, then you will note one thing like what’s proven beneath. But when you have different situations, then you will note all the situations created in that very same AWS area.

Select the precise occasion that you just simply created and click on the Actions dropdown on the high proper aspect. You can then click on on Connect from the dropdown menu.

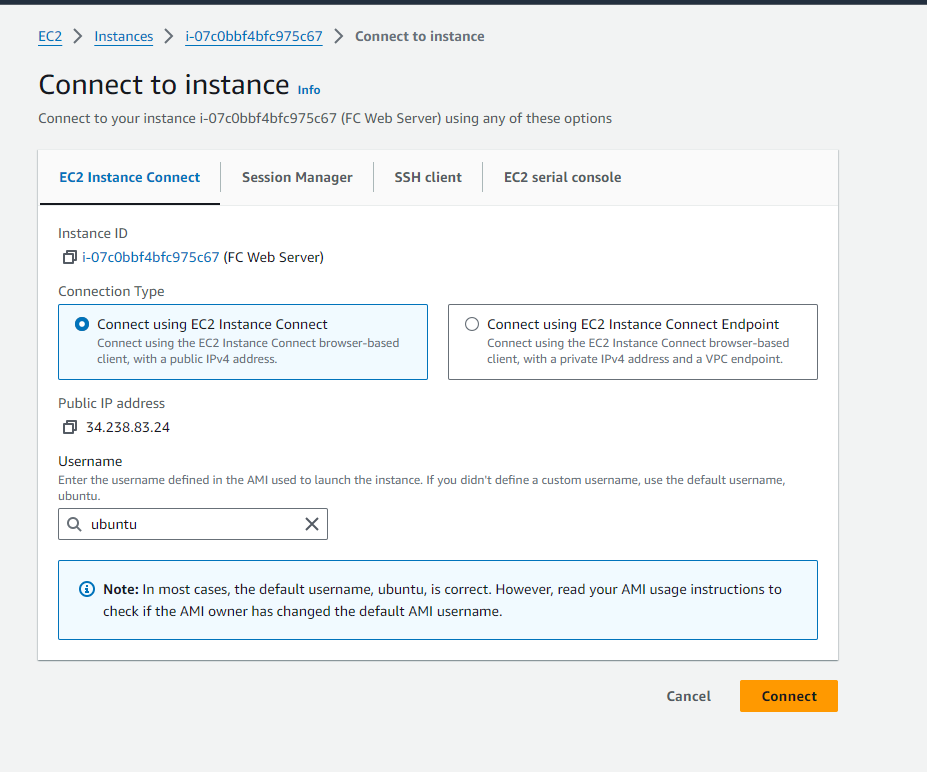
The third manner that you would have used to succeed in the connect with occasion web page is to click on on the Instance ID from the record of situations. It takes you to the occasion web page with particulars about your chosen occasion. You will then discover a Connect button on the high proper aspect.
On the Connect to occasion web page, you’re offered with a number of choices to hook up with your occasion. For the sake of this instance, you need to use EC2 Instance Connect. This possibility will assist you to connect with your digital machine by way of the browser. You can follow the default values and click on the Connect button.
This opens up a terminal within the browser. This is your digital machine. Remember that you just put in Ubuntu so now you might have entry to an Ubuntu machine with all of the specs you chose.
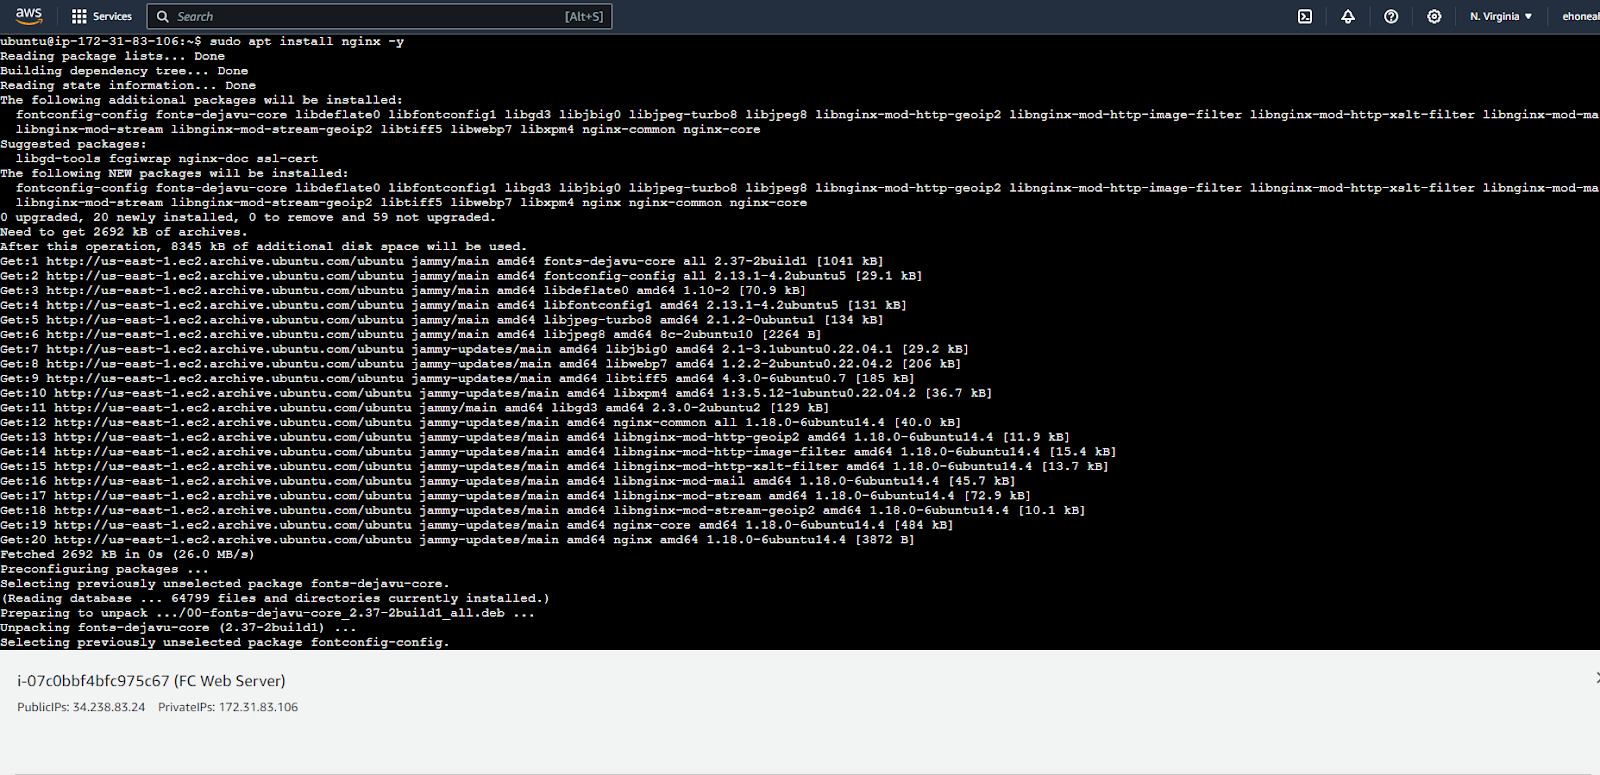
It is now time so that you can set up NGINX. Follow the steps beneath to put in NGINX in your occasion.
Update your bundle record
Use this command to replace your bundle lists:
sudo apt replace
Install NGINX
Use this command to put in NGINX:
sudo apt set up nginx -y
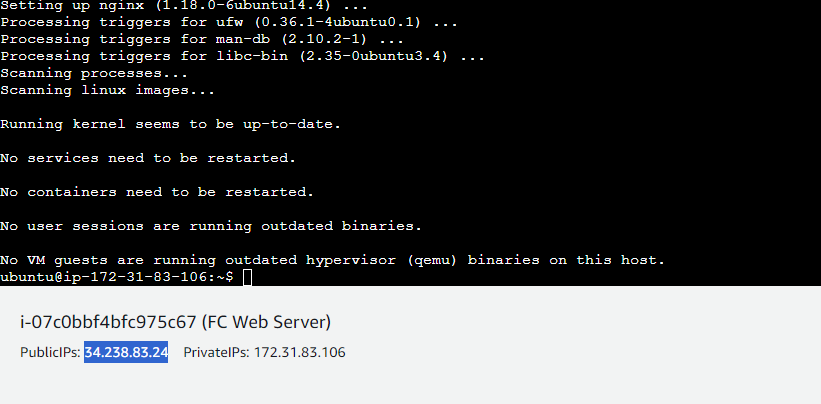
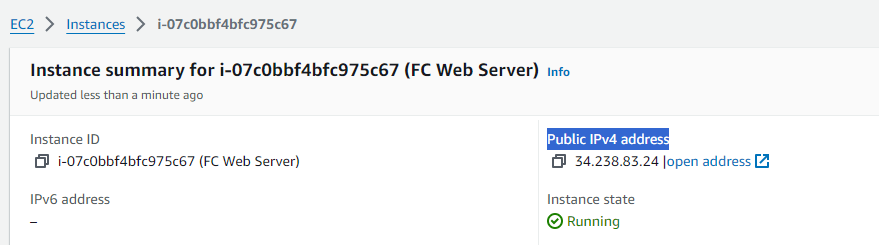
Once the set up is finished, you may entry the default web page for NGINX by coming into the general public IP deal with of your occasion within the deal with bar of your browser.
To discover the general public IP, you may test the underside of your terminal or go to the occasion web page and search for Public IPv4 deal with.
You ought to get the default web page open in your browser like proven beneath:
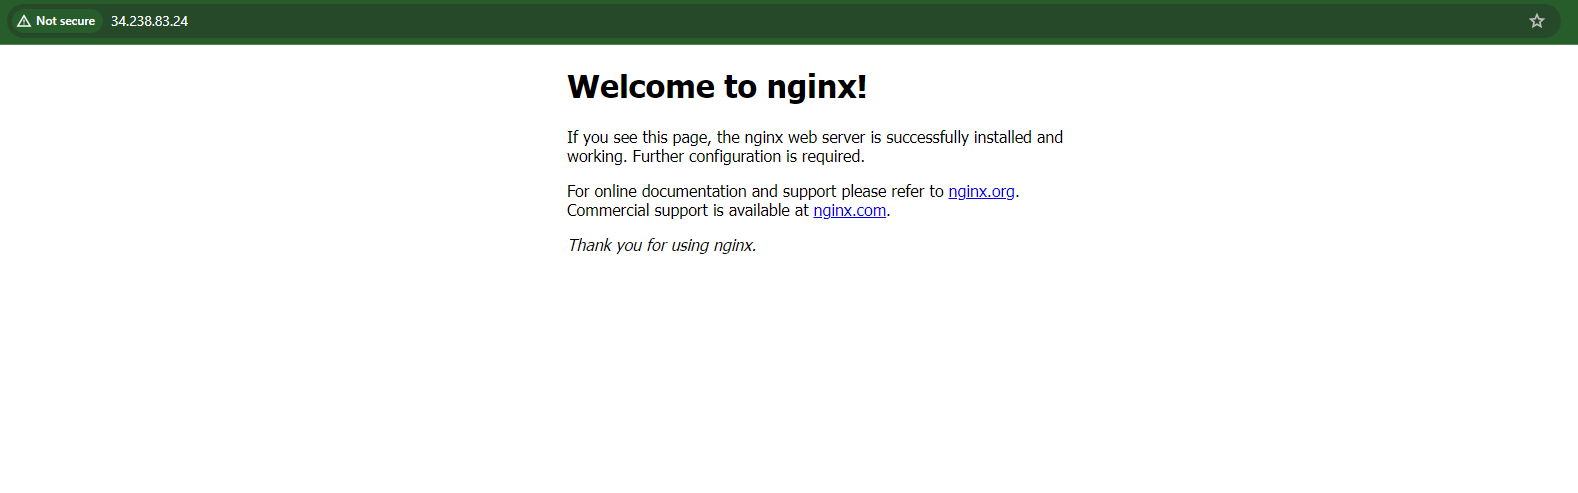
NB: You might should refresh the web page for it to work.
For the subsequent set of steps to arrange your web site or internet app, it’ll rely upon the programming language or framework that you just used. But since this tutorial is concentrated on connecting a site identify to your EC2, you may proceed with the subsequent steps for connecting the area.

Working from this picture, let’s now join our area identify to this web site. As you may see within the picture above, I’m accessing it with the general public IP deal with of the EC2 occasion.
To join the web site with a site identify merely means to exchange its IP deal with with a extra memorable identify. In our case, I will likely be changing it with the area identify krachy.com.
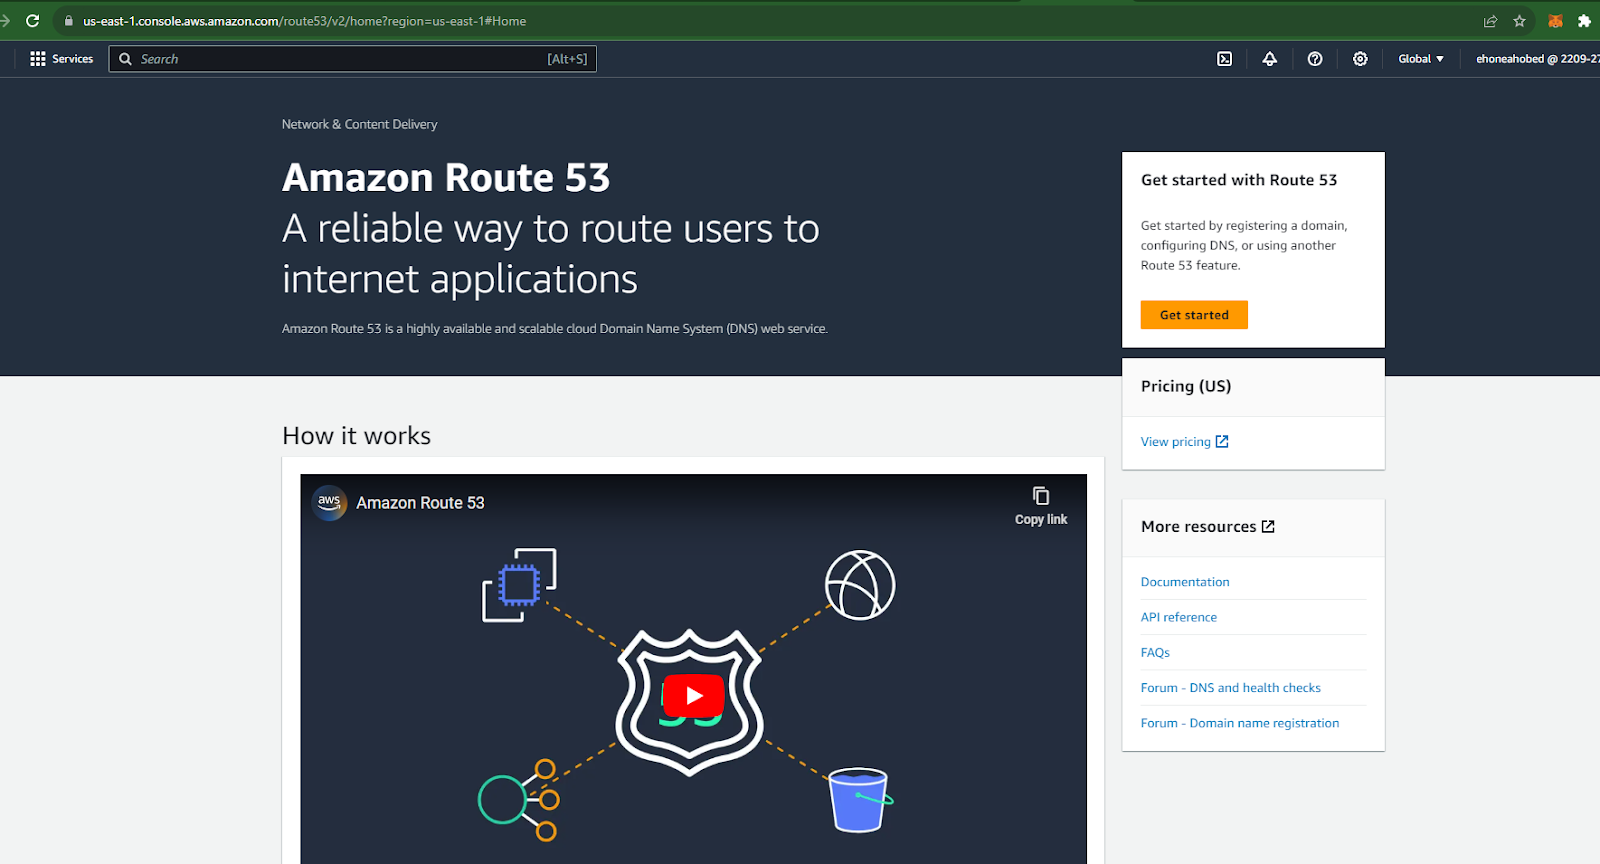
Step 2: How to Set Up Route 53 for DNS Management
AWS offers a service known as Route 53 that you need to use for DNS (Domain Name Service) administration. So now, we have to arrange this service to handle the area that you just bought.
I’ve my area with Namecheap, however the course of will likely be related for nearly each different area retailing firm.
First, you may have to create a hosted zone in Route 53.
Creating a hosted zone in Route53
To try this, click on on the orange Get began button. It takes you to the subsequent web page, as proven beneath.
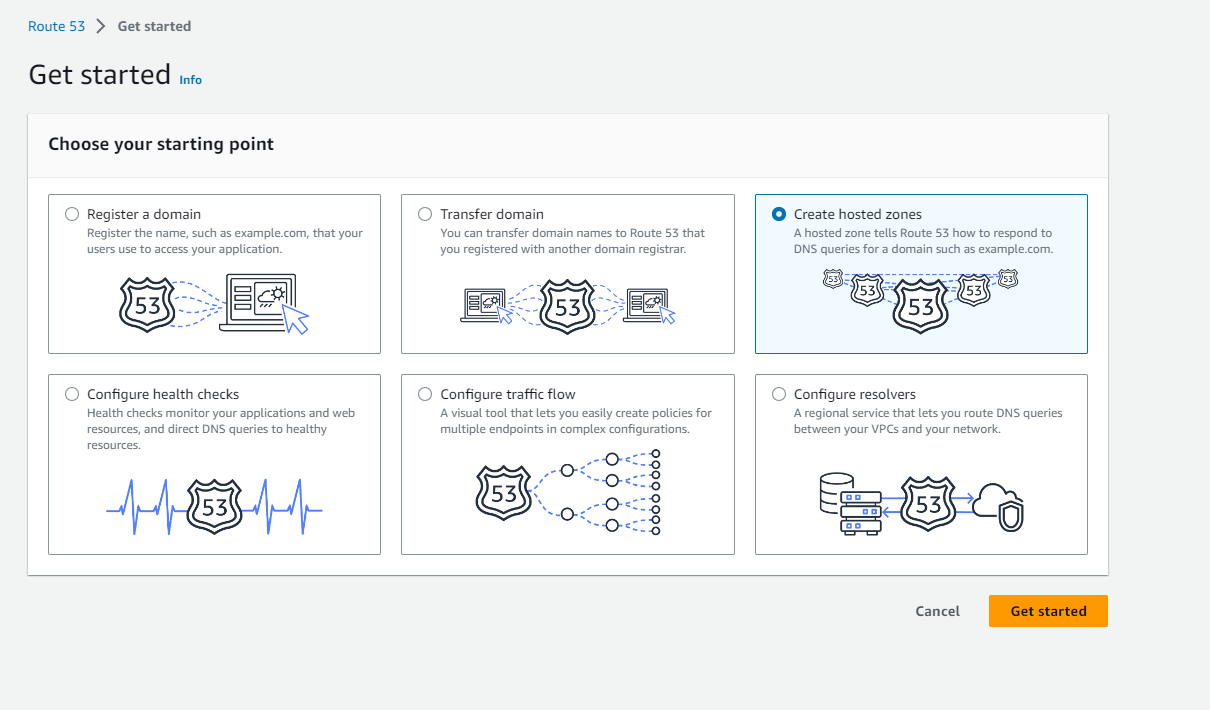
Choose Create hosted zones and click on the Get began button. Go forward and fill out the main points on the subsequent web page.


Provide the area identify that you just wish to connect with the EC2 occasion after which give it an outline that can make it simpler so that you can distinguish this hosted zone from any others you could have. Choose Public hosted zone because you need your web site to be accessible to the general public.
Click the orange Create hosted zone button.
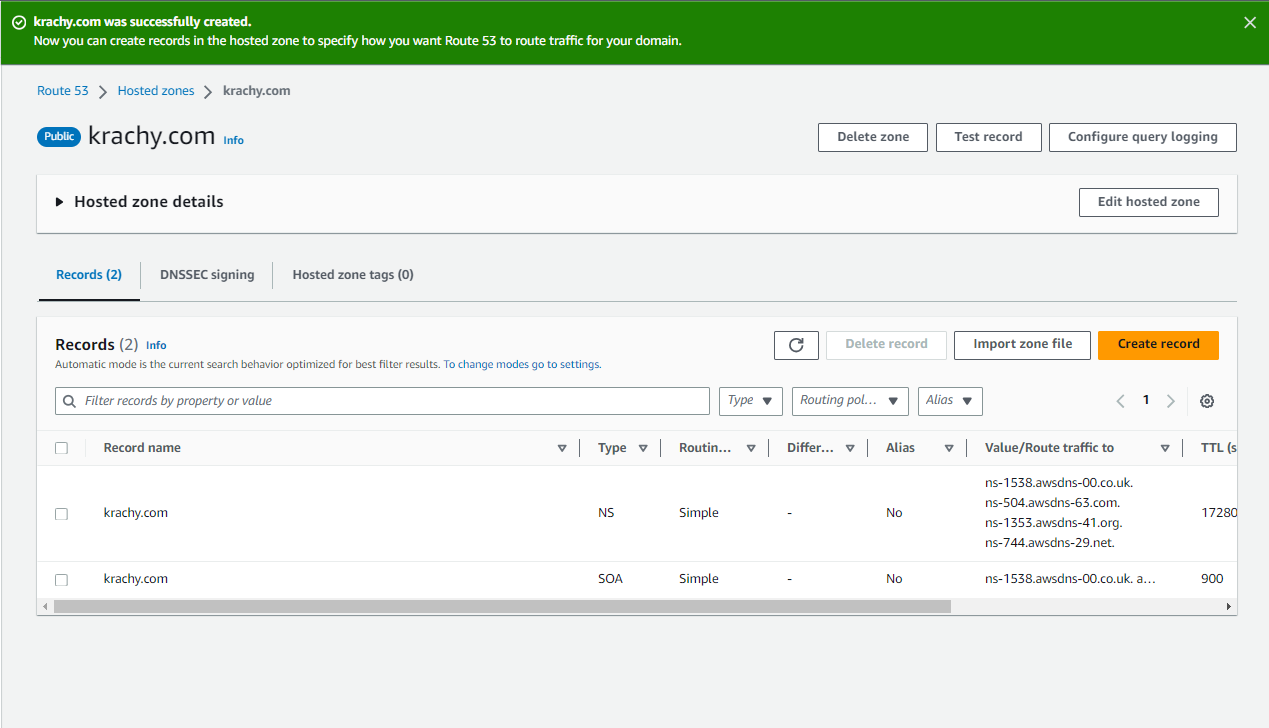
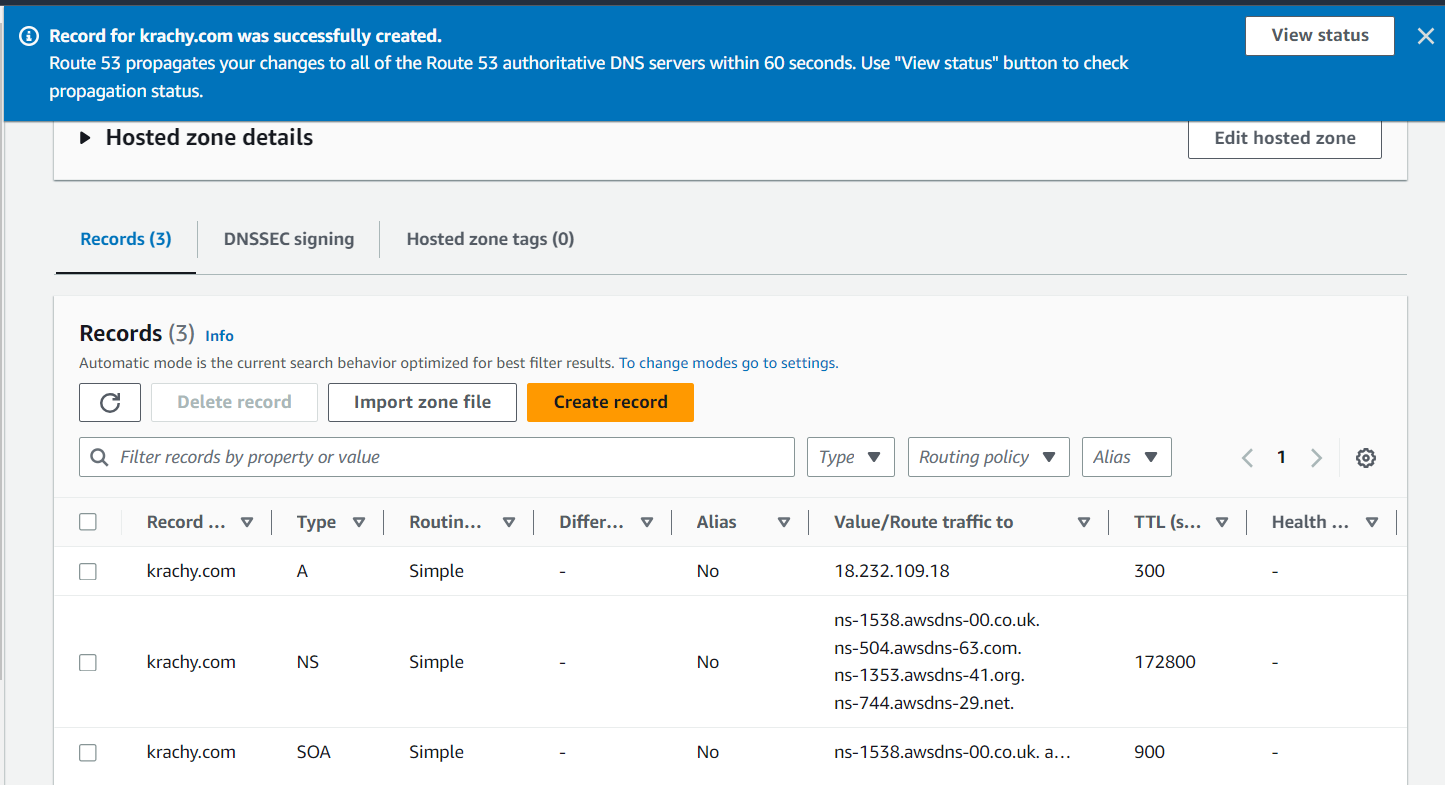
You’ll get a inexperienced success message exhibiting that you’ve efficiently created the hosted zone.
Adding data to the created Hosted Zone
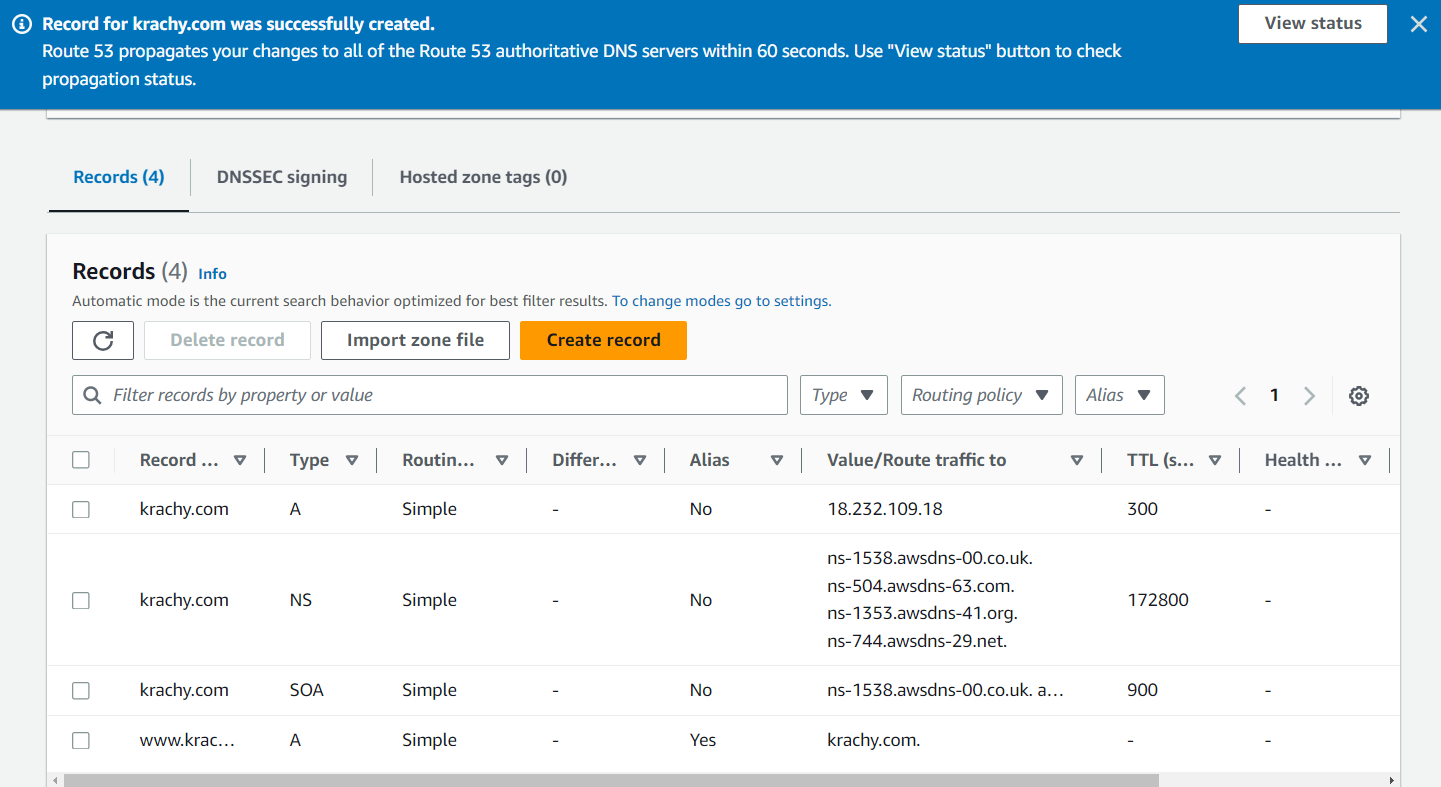
From the screenshot above, you may see that Route 53 mechanically created two data for us: the NS (Name Server) and the SOA (Start of Authority) data. The NS document is what you will have for pointing your area to this service. But earlier than you seize these, you might have a few issues to do right here.
Because our web site is being hosted on an EC2 occasion which may be accessed by way of its public IP deal with, it’s essential to create an A document for it. Also simply so you make sure that individuals who strive accessing your web site with the www subdomain are nonetheless capable of entry it, additionally, you will want so as to add one other document with an alias for it.
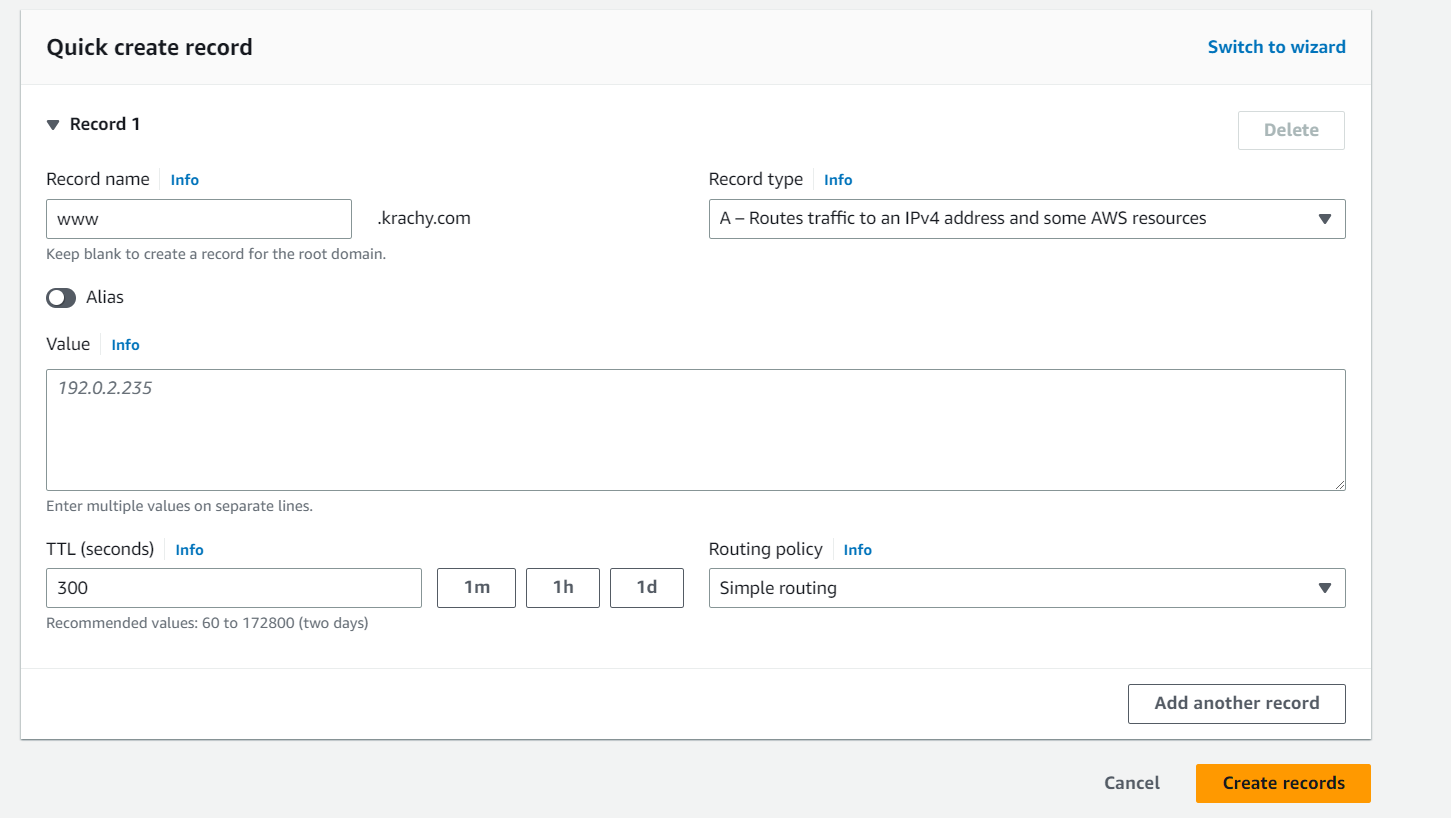
To try this, begin by clicking the orange Create document button, as you may see within the screenshot beneath:
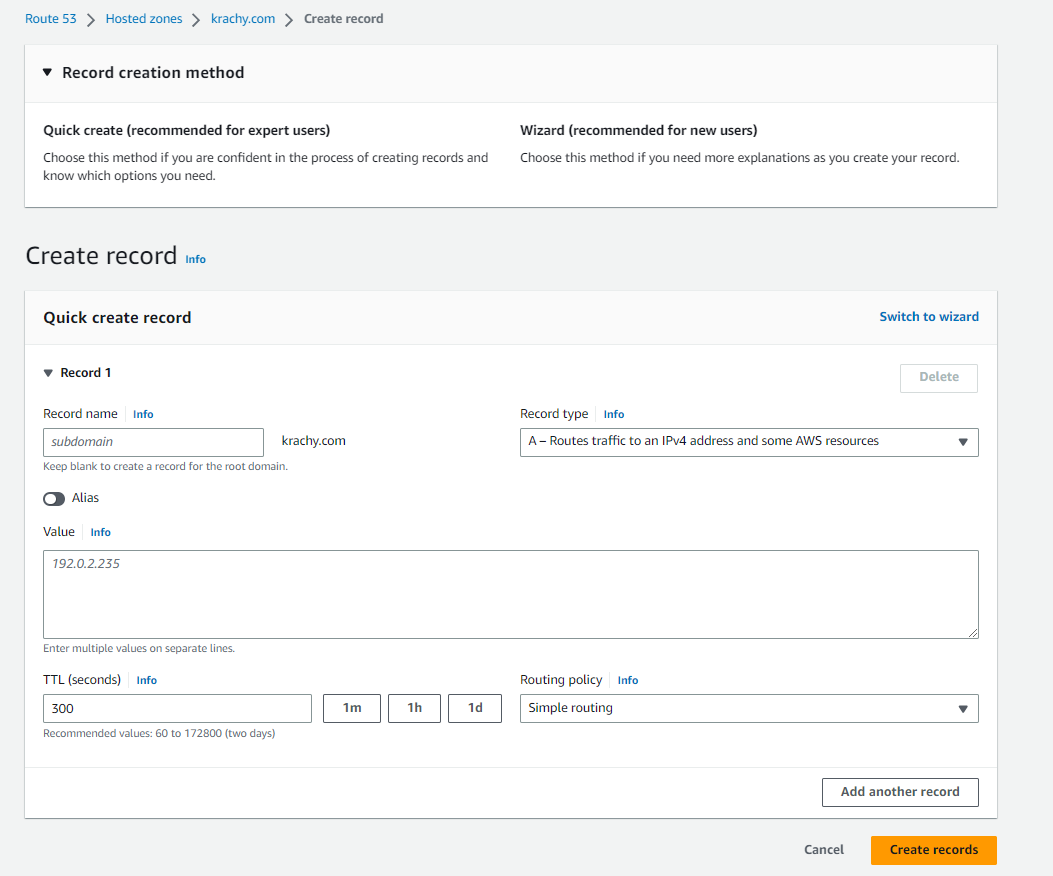
For the A document, do not put something within the subdomain enter field. Under Record sort, ensure A – Routes visitors to an IPv4 deal with and a few AWS sources is chosen. Then paste or sort the general public IP of your EC2 occasion within the textarea for Value.
You can depart every thing as default (NB: Check to make sure that the Routing coverage is Simple routing).
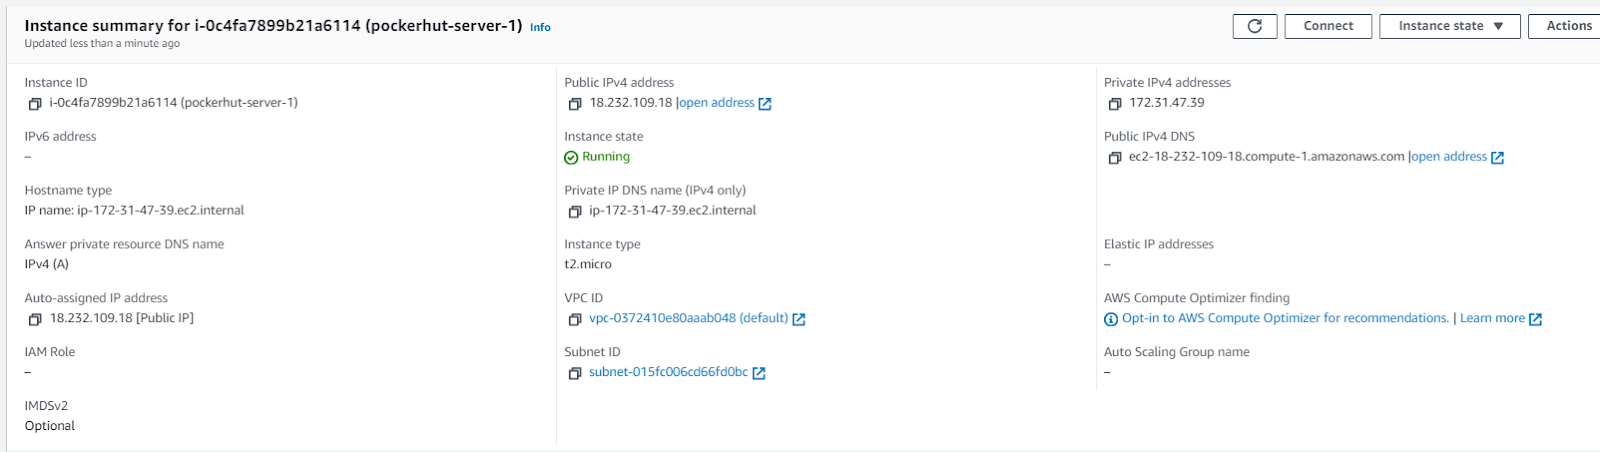
To get the IP deal with, go to the occasion that you’re utilizing and search for the Public IPv4 deal with and duplicate that.
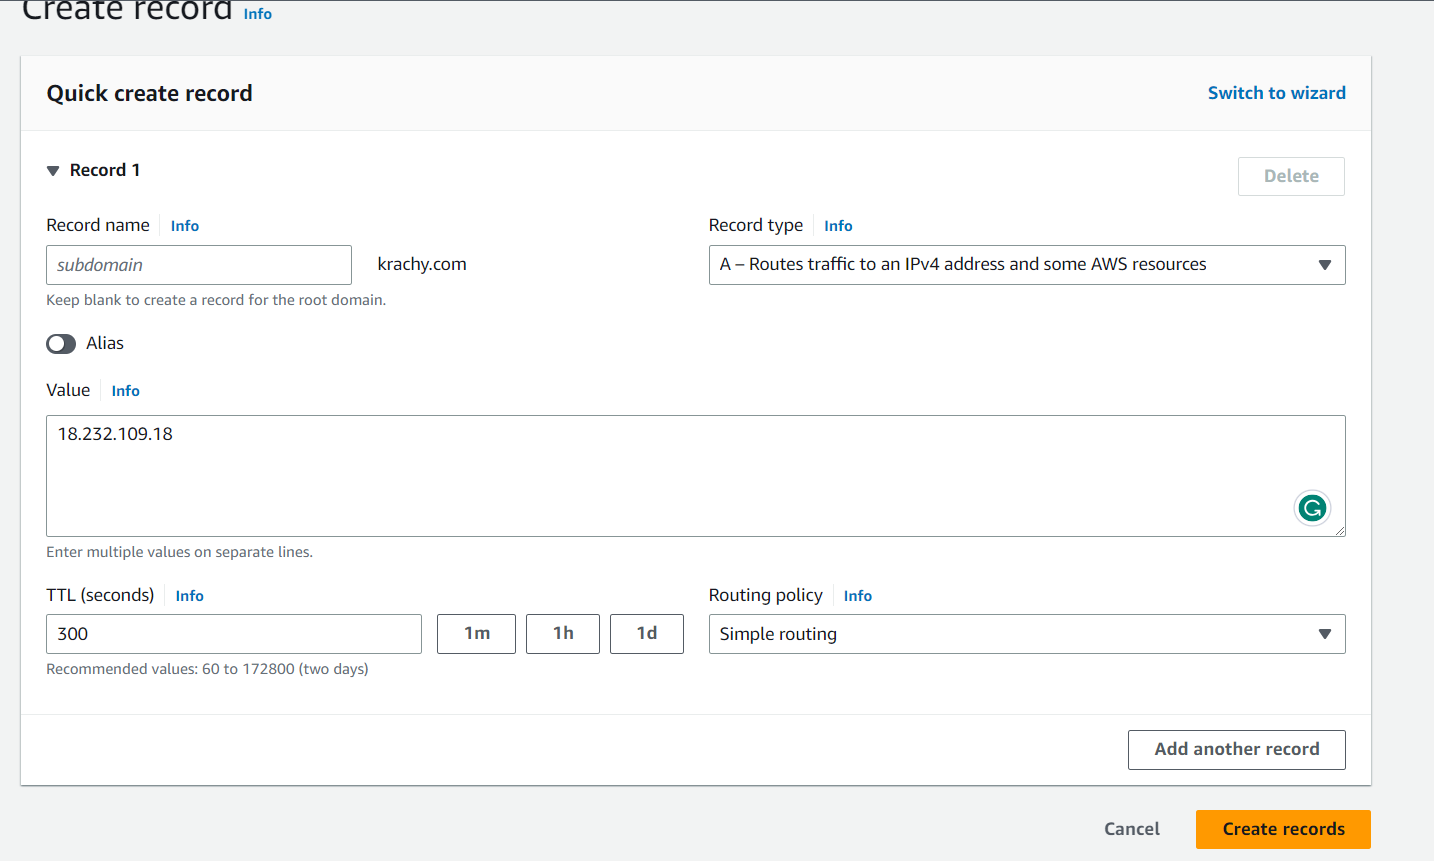
It ought to now appear to be what’s proven beneath (the place 18.232.109.18 is the general public IP for my occasion). Afterwards, click on the orange Create data button within the backside proper nook.
You ought to see successful message. Also, that the document will now be added to the data desk that you just noticed earlier, as proven beneath:
You nonetheless have so as to add the document to cater to the attainable use of www when reaching your web site. Click the Create document button so as to add that document. This time round, you’ll put www into the subdomain enter field.
Also, you will have to activate Alias which is beneath the Record identify. After turning it on, a brand new set of choices (Route visitors to) will likely be made obtainable.
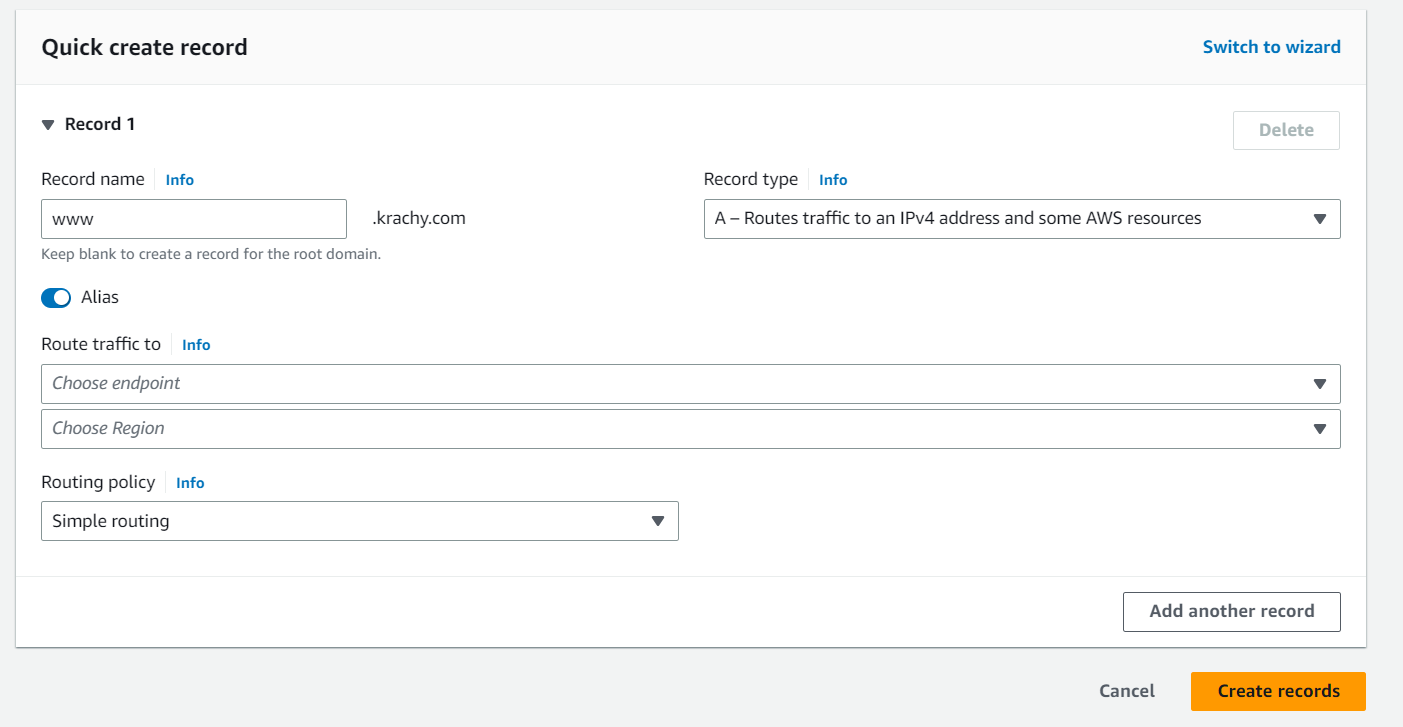
For the Choose endpoint dropdown, choose Alias to a different document on this hosted zone and the Region will mechanically be populated for you. But it additionally brings up one other subject labeled Choose document.
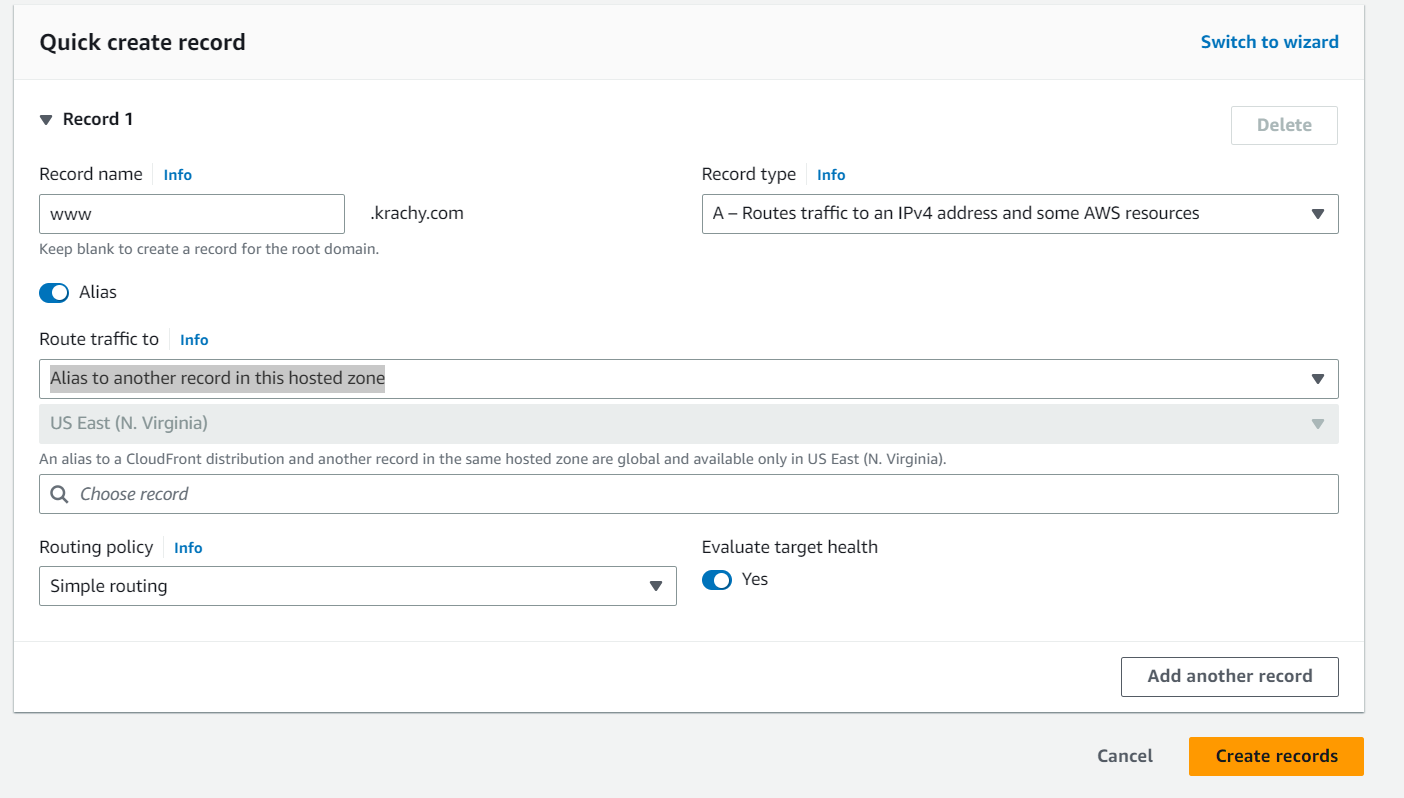
Go forward and click on throughout the Choose document subject and it’ll recommend your area identify for you. Go forward and choose it.
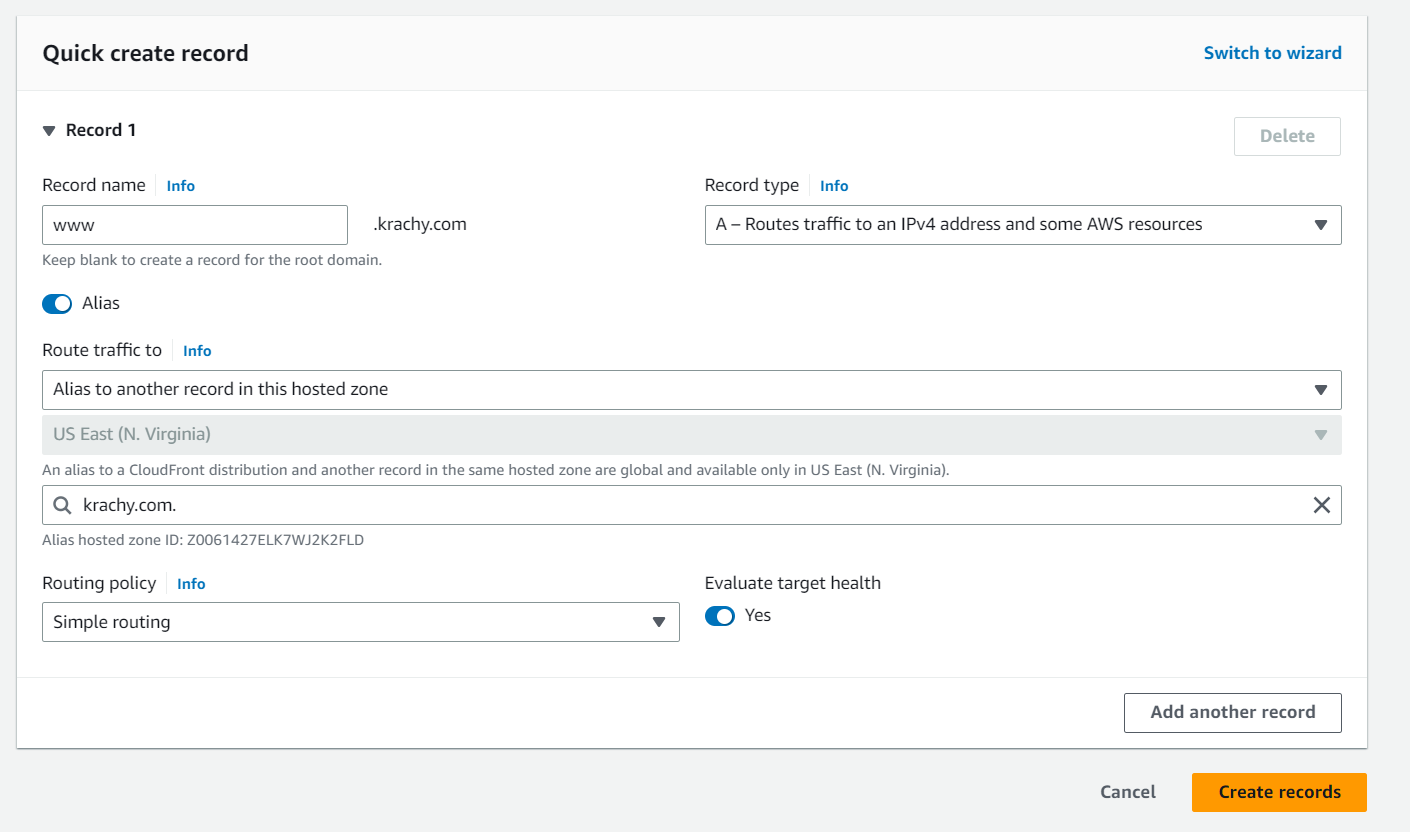
Now you’re prepared so as to add this document too so proceed to click on the Create data button. You will get successful message and see that the brand new document has been added to the data desk.
Once you’re executed organising the data, now you can proceed to replace your identify servers with our Domain retailing firm (NameLow-cost in my case).
Step 3: Update Nameservers with Your Domain Provider
If you have already got an account with a site supplier, then log in to your account. But if not, then you definately’ll want to enroll with one to buy a brand new area.
Personally, I exploit Namecheap for many of my domains. So, I will likely be exhibiting get this executed with Namecheap (however once more, it will likely be related for varied Domain suppliers).
Note that I have already got a site identify, and for any area that you just buy you’ll have some default nameservers. Your aim right here is to alter the default nameservers or no matter your nameservers at present are to those which Route 53 offers you.
Changing nameservers in Namecheap

Click on the Domain record to see an inventory of all of the domains that you’ve in that account. Look for the precise area that you’ve.
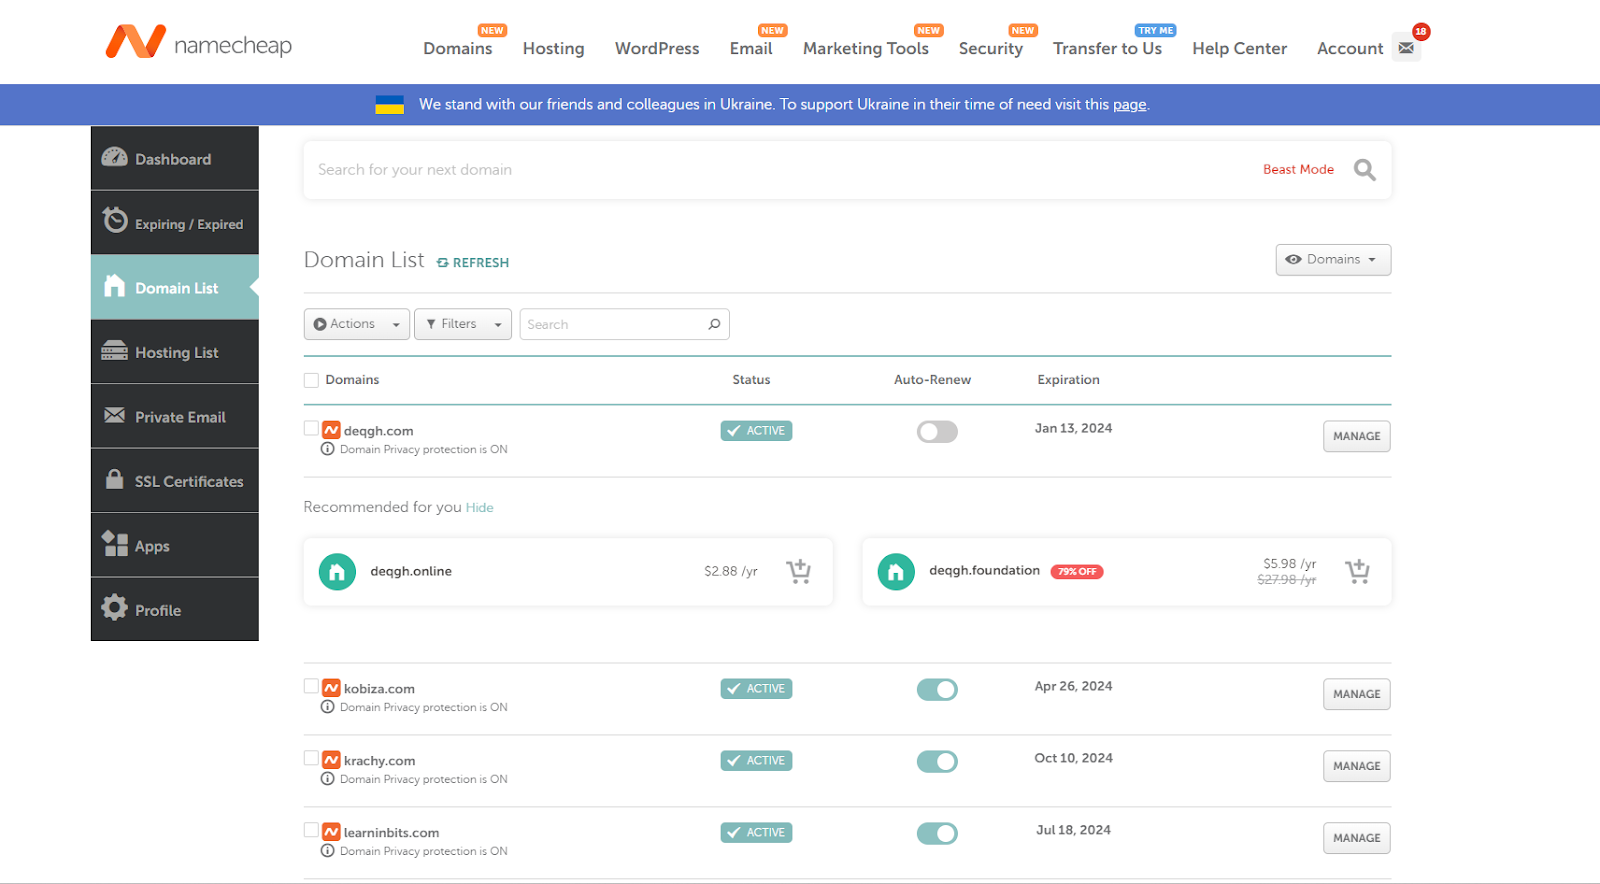
Next to every area identify, you can see the Manage button. Click the respective one for the area that you’re utilizing (krachy.com in my case).
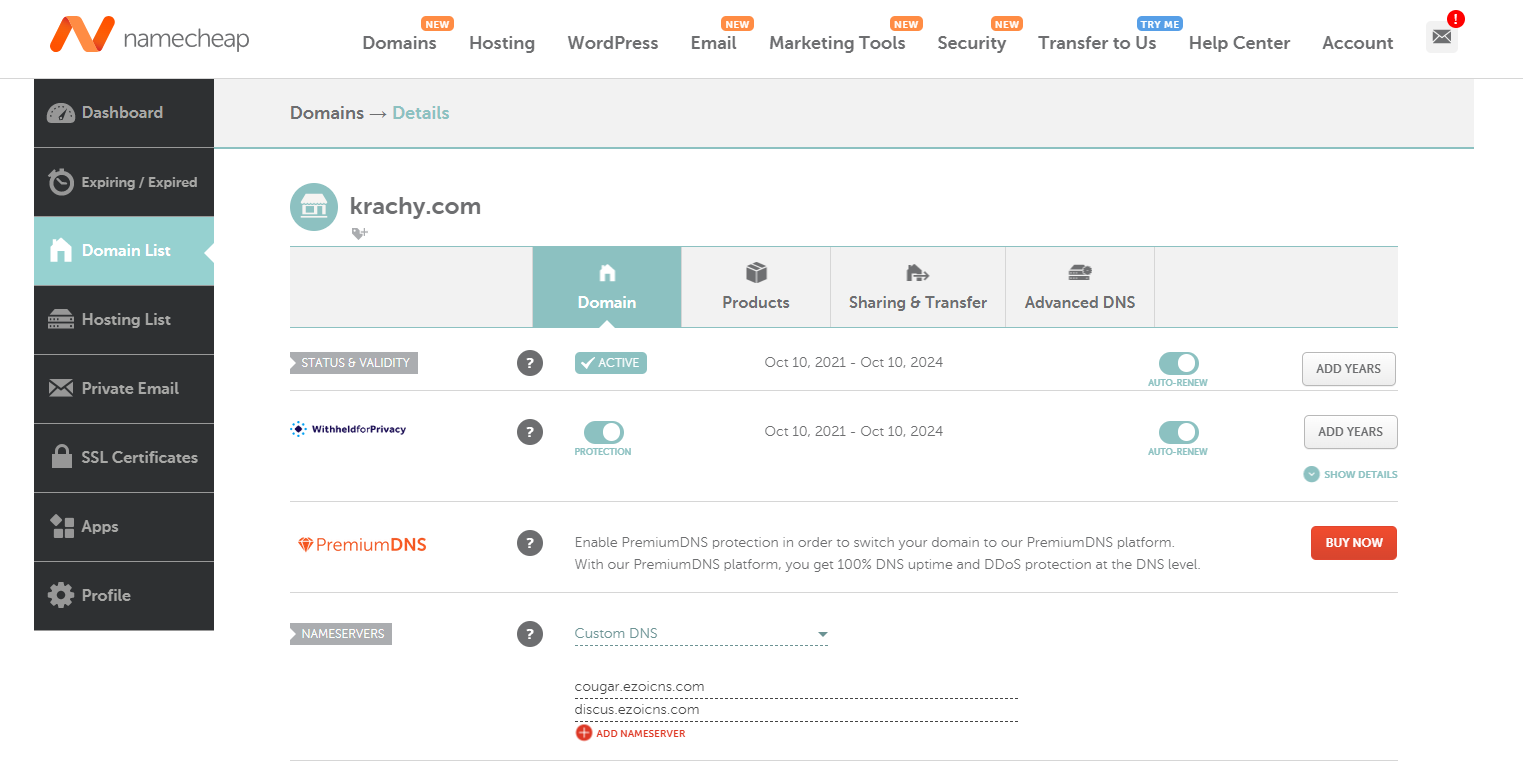
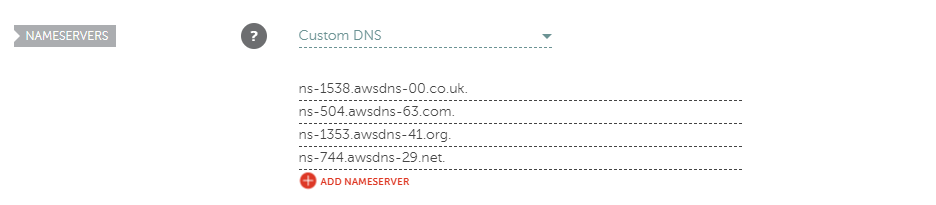
Under Nameservers, be sure to have chosen Custom DNS. Then return to Route 53 and duplicate the nameservers that you just have been supplied with. Then delete what you at present have and add what you get from Route 53.
In my case, Route 53 gave me 4 completely different Nameservers. So I’ve to repeat them one after the opposite and add them to Namecheap (bear in mind to delete any previous ones that have been within the area supplier account).

In Namecheap, they supply two areas for the nameservers – however there’s a button just under that allows you to add greater than 2. In my case, I added all 4 of them as you may see beneath:
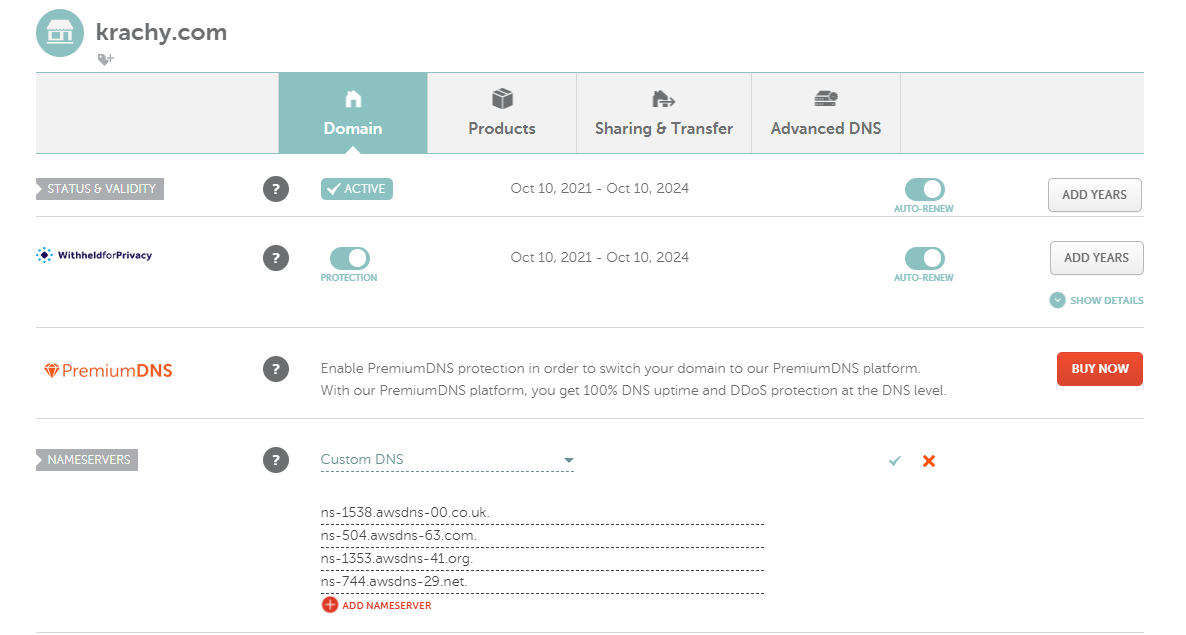
Also, after including them, it’s essential to settle for the modifications and save them. In the screenshot above, you may see that on the far proper of Custom DNS is a test mark and an x mark. Click on the test mark to save lots of the modifications.
After saving, you’ll discover that these buttons are now not obtainable.
Step 4: DNS Propagation
Congratulations, you are actually executed with the arrange. Now you simply want to attend for the DNS propagation to be accomplished.
This step doesn’t contain you taking any motion, however simply ready for a few minutes. The propagation can take wherever from a few minutes to greater than 24 hours.
But after a short time, simply enter your area identify in your browser’s deal with bar and see if it reveals the web site that you’ve hosted on the EC2 occasion.
Once the DNS propagation goes by way of, your web site will likely be reside on the area identify that you just used. Congratulations as soon as once more!
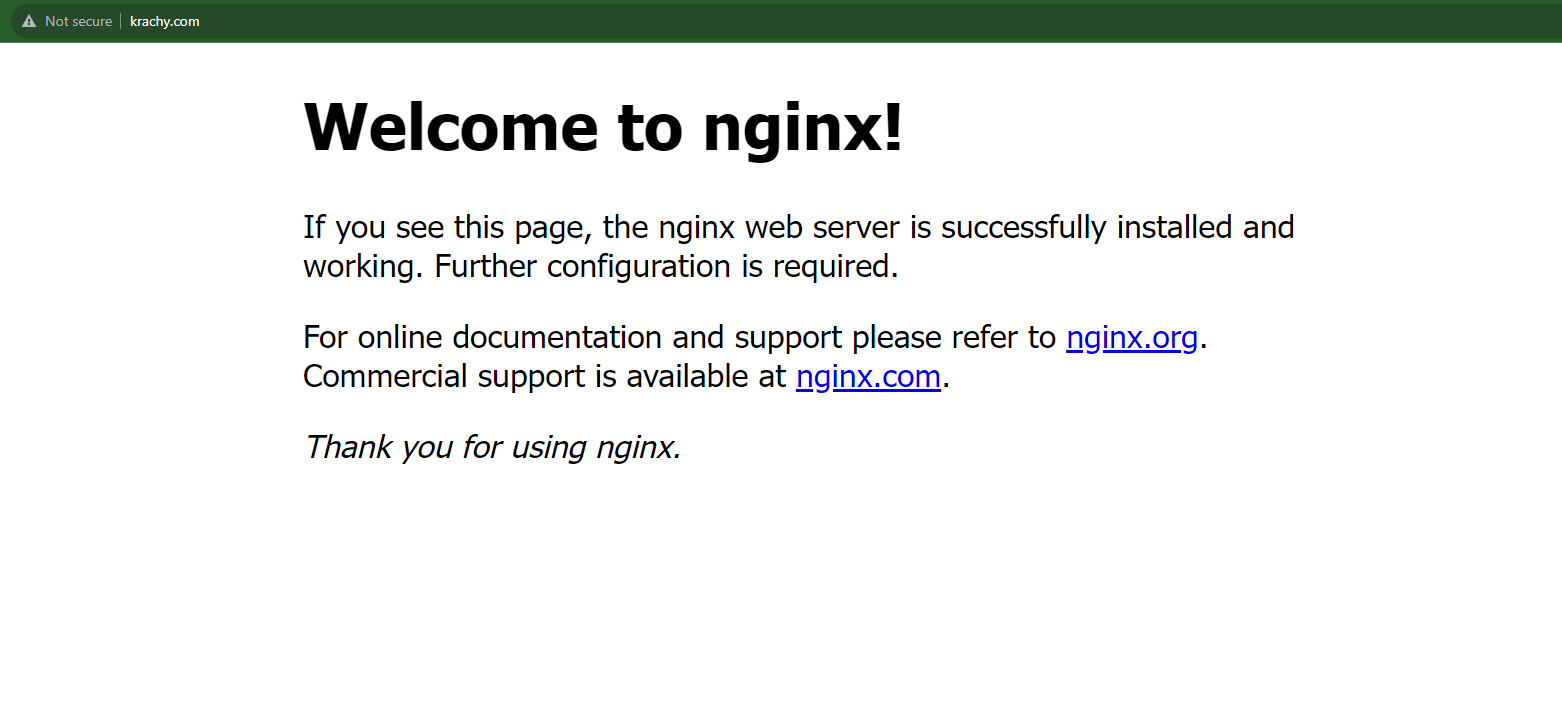
As you may see, this is identical interface that I began with – however the excellent news is that now, I accessed it with the area identify I bought and never the IP deal with of the occasion.
Wrapping Up
Even although you’re executed, you’re at present utilizing a non-secured switch protocol (http) to your web site. This is as a result of you have not but put in an SSL certificates in your web site.
Watch out for my subsequent tutorial the place I stroll you thru set up SSL in your area to make it safe (https).