
A desk of contents (or TOC) is a listing of chapters or part titles in an article. You’ll normally discover it initially of an article, proper after the introduction.
When you write an extended weblog publish or an article with unbiased sections, think about including a desk of contents. It may also help your readers perceive your article’s content material and know what’s coming. Providing hyperlinks to every title within the desk of contents helps readers navigate between the sections they wish to take a look at.
Having a desk of contents in your articles additionally advantages you as a author. First, you may simply see the stream of your article. Another profit is that it could possibly improve your weblog’s visitors. If your readers have an ideal expertise studying your article, they are going to seemingly bookmark and return to it.
Some publications use Ghost to put in writing and publish articles on their web site, and freeCodeCamp is one in all them. In this text, I’ll stroll you thru how you can add a clickable desk of contents to your article on Ghost.
Table of Contents
Understanding Headings
Before we soar into how you can add a desk of contents, let’s take a second to know “headings” as a result of I’ll use this time period going ahead.
Headings are titles of sections and subsections which might be displayed on an internet site.
There are six ranges of headings primarily based on the significance of the part.
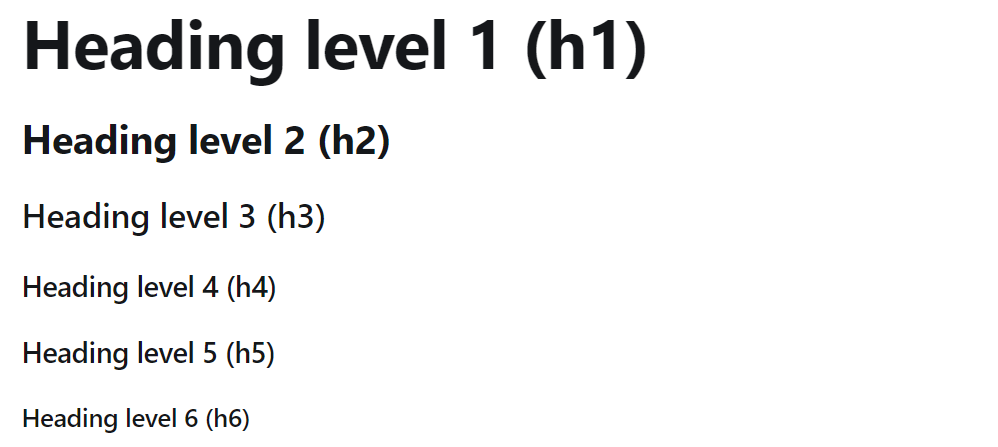
Following greatest practices, a web page on an internet site ought to solely have one heading degree 1 (referred to as h1). It is the principle title of the web page. In your case, it will be the principle title of your article. (In this text, it is “How to Add a Table of Contents to Your Article on Ghost”.)
So, writing an article on Ghost (or another publication platform) leaves you with h2 to h6 to your part and subsection titles. And you should use as a lot of them as you want relying on the hierarchy and group of your content material.
How to Add a Table of Contents
You can create your desk of contents everytime you need – earlier than you write, through the course of, or after you end writing your article.
But you may solely add the hyperlink to every chapter or part title after writing your article. This is since you’ll must know precisely how the textual content of the headings will seem to be able to hyperlink to them correctly, as you may see beneath.
In this information, I’ll present you how you can construct a ToC in HTML, which lets you add subheadings along with most important headings/part titles.
Step #1 – Create a List of Headings
You can create a desk of contents with a checklist of one-level headings (h2) or embrace the subheadings (h3 to h6) if you wish to.
You may also select the way you wish to format your checklist:
- Unordered List: A listing with bullet factors.
- Ordered List: A listing with numbers.
Create a List of One-Level Headings
Follow these steps to create a one-level headings checklist:
- Insert a brand new line.
- Type a touch (
-) or an asterisk (*) for the unordered checklist. Or, kind a quantity and add a interval — for instance,1.— for the ordered checklist. - Hit the spacebar.
- Add the title.
- Click enter so as to add a brand new merchandise within the checklist.

Note: You can skip the subsequent part and go on to “Step #2 – Inspect a Heading and Find the id” if you would like.
Create a List with Subheadings
If you want to create a listing with subheadings (nested checklist), you have to use HTML to format it manually, as Ghost does not have nested checklist choices constructed into the editor.
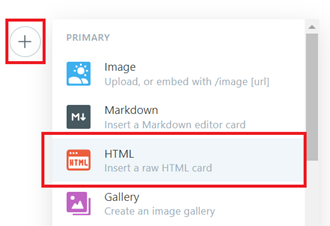
First, you might want to add the HTML card:
- Start on a brand new line.
- When your cursor is on the brand new line, you will note a plus (
+) icon button within the circle on the left. Click this button. - Click the “HTML” choice.
Afterward, you will note the HTML card, as proven within the picture beneath.
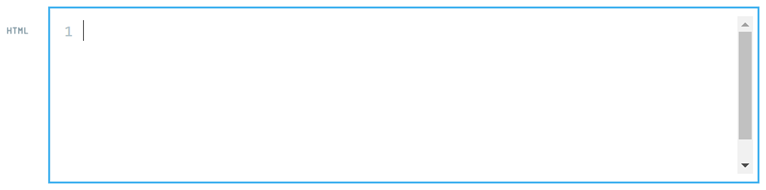
Now, let’s begin including the checklist of your headings and subheadings.
Add an HTML unordered checklist (<ul></ul>) or an ordered checklist (<ol></ol>) ingredient.
<ul></ul>

or

<ol></ol>To add the checklist of your headings, add an area between the ul or ol tags. Put the cursor between the tags and hit enter twice.
<ul>

</ul>
Then, add checklist parts (<li></li>) within the empty line between the opening and shutting ul or ol tags. Add these checklist parts primarily based on the variety of your part titles.
<ul>
    <li></li>
    <li></li>
    <li></li>
</ul>Afterward, put every of the titles between the li tags.
<ul>
    <li>Heading 2 - Part 1</li>
    <li>Heading 2 - Part 2</li>
    <li>Heading 2 - Part 3</li>
</ul>To add subheadings, repeat all of the steps. But now, it’s best to put the ul or ol ingredient contained in the li ingredient(s) that maintain the part title. Here’s how you can do it:
- Place your cursor between the tip of the part title and the
</li>tag, then click on enter. - Click enter once more so as to add an area and add an
ulorolingredient for the subheadings. - Add an
ulorolingredient within the new line, put the cursor between the tags, and hit enter twice so as to add an area. - Add
liingredient(s) within the new line between theuloroltags. - Put the subsection title between the
litags.
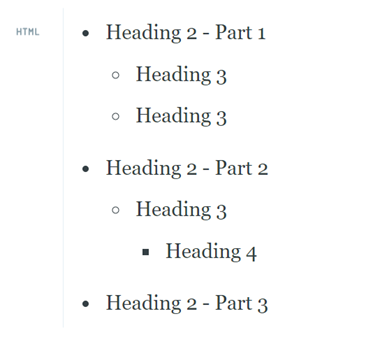
Below is an instance of a desk of contents with subheadings in HTML.
<ul>
    <li>Heading 2 - Part 1
        <ul>
            <li>Heading 3</li>
            <li>Heading 3</li>
        </ul>
    </li>
    <li>Heading 2 - Part 2
        <ul>
            <li>Heading 3
                <ul>
                    <li>Heading 4</li>
                </ul>
            </li>
        </ul>
    </li>
    <li>Heading 2 - Part 3</li>
</ul>
And the end result will appear to be this:
Step #2 – Inspect a Heading and Find the id
After creating the checklist, it is time to add the hyperlinks to the titles in your desk of contents.
But first, you might want to discover the id attribute of your heading utilizing preview mode by inspecting the title along with your browser’s (Chrome or Firefox) developer instruments.
So, let’s open your preview mode:
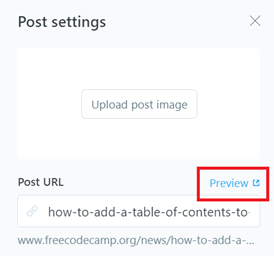
- Click the gear icon on the highest proper of your Ghost editor.
- Click the “Preview” hyperlink beside the “Post URL” enter.
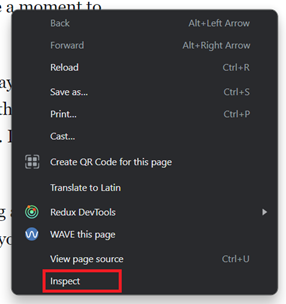
Now that you’re within the preview mode, right-click your mouse. You will see some choices. Click the “Inspect” choice to open the developer instruments.
In the developer instruments, let’s click on the button with a field and arrow icon on the highest left to pick out a heading ingredient on the web page and examine it.

Hover over a title and click on on it. It will spotlight the ingredient you wish to examine within the developer instruments. Inside the heading ingredient (h2 to h6), you will note an id (proven with a purple line within the picture beneath).

Double-click on the worth contained in the quote marks of the id and duplicate it. You will use it so as to add the hyperlink to the title within the desk of contents.
Note:
Step #3 – Add the Link
Add a Link to a Heading
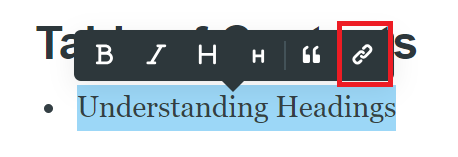
To add the hyperlink, return to your desk of contents within the Ghost editor. Then, comply with these steps:
- Highlight the title that you simply wish to add the hyperlink to.
- Click the chain icon.
- Type a hashtag (
#) within the enter area and paste your copiedidworth.
So, will probably be like this:
#understanding-headingsid worth of a heading.After you refresh the preview web page, examine if the hyperlink works. It ought to take you to the goal part once you click on the title’s hyperlink. If not, learn the “Why Does the Link Not Work?” part.
Add a Link to a Heading in HTML
First, let’s return to your Ghost editor and go to the li ingredient that holds the title within the desk of contents.
Then, wrap the title inside an anchor ingredient (<a></a>) and add href="" attribute within the opening tag.
<ul>
    <li><a href="">Understanding Headings</a></li>
</ul>The anchor ingredient creates a hyperlink, and the href attribute is the placeholder for the hyperlink’s vacation spot.
Now, you’ll add the hyperlink’s vacation spot. Type a hashtag (#) and paste the id worth you have copied contained in the double quotes of the href.
<ul>
    <li><a href="#understanding-headings">Understanding Headings</a></li>
</ul>href.Repeat all of the steps so as to add a hyperlink for every title.
Below is an instance of part and subsection titles with hyperlinks in HTML:
<ul>
    <li><a href="#understanding-headings">Understanding Headings</a></li>
    <li><a href="#adding-a-table-of-content">Adding a Table of Content</a>
        <ul>
            <li><a href="#step-1-create-a-list-of-titles">Step #1 - Create a List of Titles</a></li>
        </ul>
    </li>
</ul>After refreshing the preview web page, now you can examine if the hyperlink works by clicking it. If it does not work, learn the subsequent part.
Why Does the Link Not Work?
If you click on a hyperlink in your desk of contents and it goes nowhere or redirects you to a “404 Page not discovered”, return to the preview web page. Refresh it, and attempt to click on the hyperlink once more.
If it nonetheless does the identical, you might want to examine the hyperlink within the Ghost editor.
Sometimes, it may be a typo the place you modify the title however nonetheless must replace the hyperlink. Or there’s a lacking hashtag (#) within the hyperlink.
Final Words
If you appreciated and located this text useful, please share it with others. You can discover different works on my weblog. Let’s join on X (previously Twitter) or LinkedIn.