Research has proven that players trying to construct a gaming PC spend round R33k – R35k on all the construct. In 2022, 60% of players who constructed a brand new rig had been prepared to spend over R30,000 on the elements. So what does R30,000 get you precisely? That was my objective for this venture. I wished to see what elements you possibly can choose up, the place you would need to minimize prices and ultimately, what benchmarks you possibly can anticipate from a high-end 1440p gaming PC constructed for between R30,000 and R35,000.
Watch this 1440p funds PC construct video beneath
This content material relies on a construct that totals precisely R34,968. So it’s simply shy of R35,000. Keep in thoughts that it doesn’t embrace a monitor, equipment or a Windows license. If it did, it might be much more costly. You’ll seemingly not fear about this when you’re constructing a brand new or upgraded rig to your present setup.
Before I get began, I wish to thank Gigabyte for the assistance with this PC construct. The model despatched over the Gigabyte B760 Aorus Master DDR4 so as to add to this construct. The motherboard’s value was factored into this general construct despite the fact that we didn’t technically pay for it. We additionally solely had a funds of R30,000 ourselves in order that they actually got here by means of to assist pull this off.
Motherboard – Gigabyte B760 Aorus Master DDR4
Speaking of which, the motherboard was the very first thing we began with on this construct. The Gigabyte B760 Aorus Master DDR4 prices between R5,499 and R,5999 relying on the place you get it. I factored in its highest value for this construct at R5,999. The B760 is a DDR4, LGA 1700 socket motherboard that helps each the Intel Twelfth-gen and Thirteenth-gen CPUs.

The motive why we opted for this board is especially because of its Wi-Fi and Bluetooth assist. You actually can’t go with out that nowadays on a PC. Also, when you’re constructing a brand new rig, you may as properly get these options from the beginning quite than shopping for a separate dongle or PCI-E card later down the road.
The board packs fairly numerous options and features a totally lined MOSFET heatsink for individuals who wish to push the thermals in your CPU up a bit. It additionally packs 3 PCIE 4.0 slots with 4 M.2 slots for all of the SSD expansions you’ll want.

The principal options right here embrace a 2.5GbE LAN port, entrance USB C 10GB/s port, WiFi 6E, Bluetooth 11ax and a spread of extra ports. These ports embrace 1 USB C 3.2 Gen 2×2, 1 USB Type A 3.2 Gen2 port, 6 USB USB 3.2 Gen 1 ports, DisplayPort, HDMI, RJ-45, optical and 5 audio jacks.
The Gigabyte B760 Aorus Master DDR4 additionally helps Q-Flash which is a superb characteristic for establishing your PC and putting in the newest BIOS proper from the get-go. It can also be ATX suitable so ought to match within the majority of PC instances round.
RAM – Corsair VENGEANCE RGB RS 32GB 3600MHz
I first unboxed the motherboard and set it apart to arrange for the PC case. This marked the right alternative to put in the RAM and different extra elements. I began off with the RAM. We picked up the Corsair 32GB VENGEANCE 3600MHz. This RAM equipment value R1980 and appears fairly cool. It options customizable RGB on the highest and comes with a twin heatsink shell to maintain issues cool. Installing it was so simple as it could possibly be.

SSD – Corsair Force Series MP600 1TB NVMe PCIe M.2 SSD
Next was the SSD. We went with the Corsair Force Series MP600 SSD and picked a 1TB mannequin. It comes with a heatsink put in on it already so we needed to take away the PCIE heatsink on the B760 with the intention to use it. Of course, this meant that after eliminated, we couldn’t put it again as a result of additional thickness on the SSD. If you’re somebody who desires the SSD hidden away, remember to get a heatsink-free mannequin so you possibly can put the motherboard plate again on.

Installing the SSD was fairly easy and we simply needed to peel off the protecting plastic, slot it into the M.2 slot and push it down firmly to lock the plastic cap in place. No screws are wanted to lock the SSD in place on the B760. The latch additionally lets you shortly take away the SSD with none trouble too.
CPU – Intel Core i5 13600K – Up to five.1GHz
Next was the CPU. We had been initially going to go for a Twelfth-Gen i5 however contemplating the value distinction between the Thirteenth Gen, it made sense to place the additional money in and improve it. I’ve already lined the Intel Core i5 13600K on the channel a couple of occasions already and it holds up fairly properly. If something, it might be the gamer’s Intel alternative when a PC for this value. Anything larger may be powerful to suit into the funds.

I do benchmark this PC afterward and check the CPU underneath baseline clock circumstances. So you’ll see simply how this rig performs because of this Thirteenth-Gen Intel Core-i5. But the standard set up course of takes place. We unboxed it, unhinged the CPU bracket, slotted within the chip and closed it up.
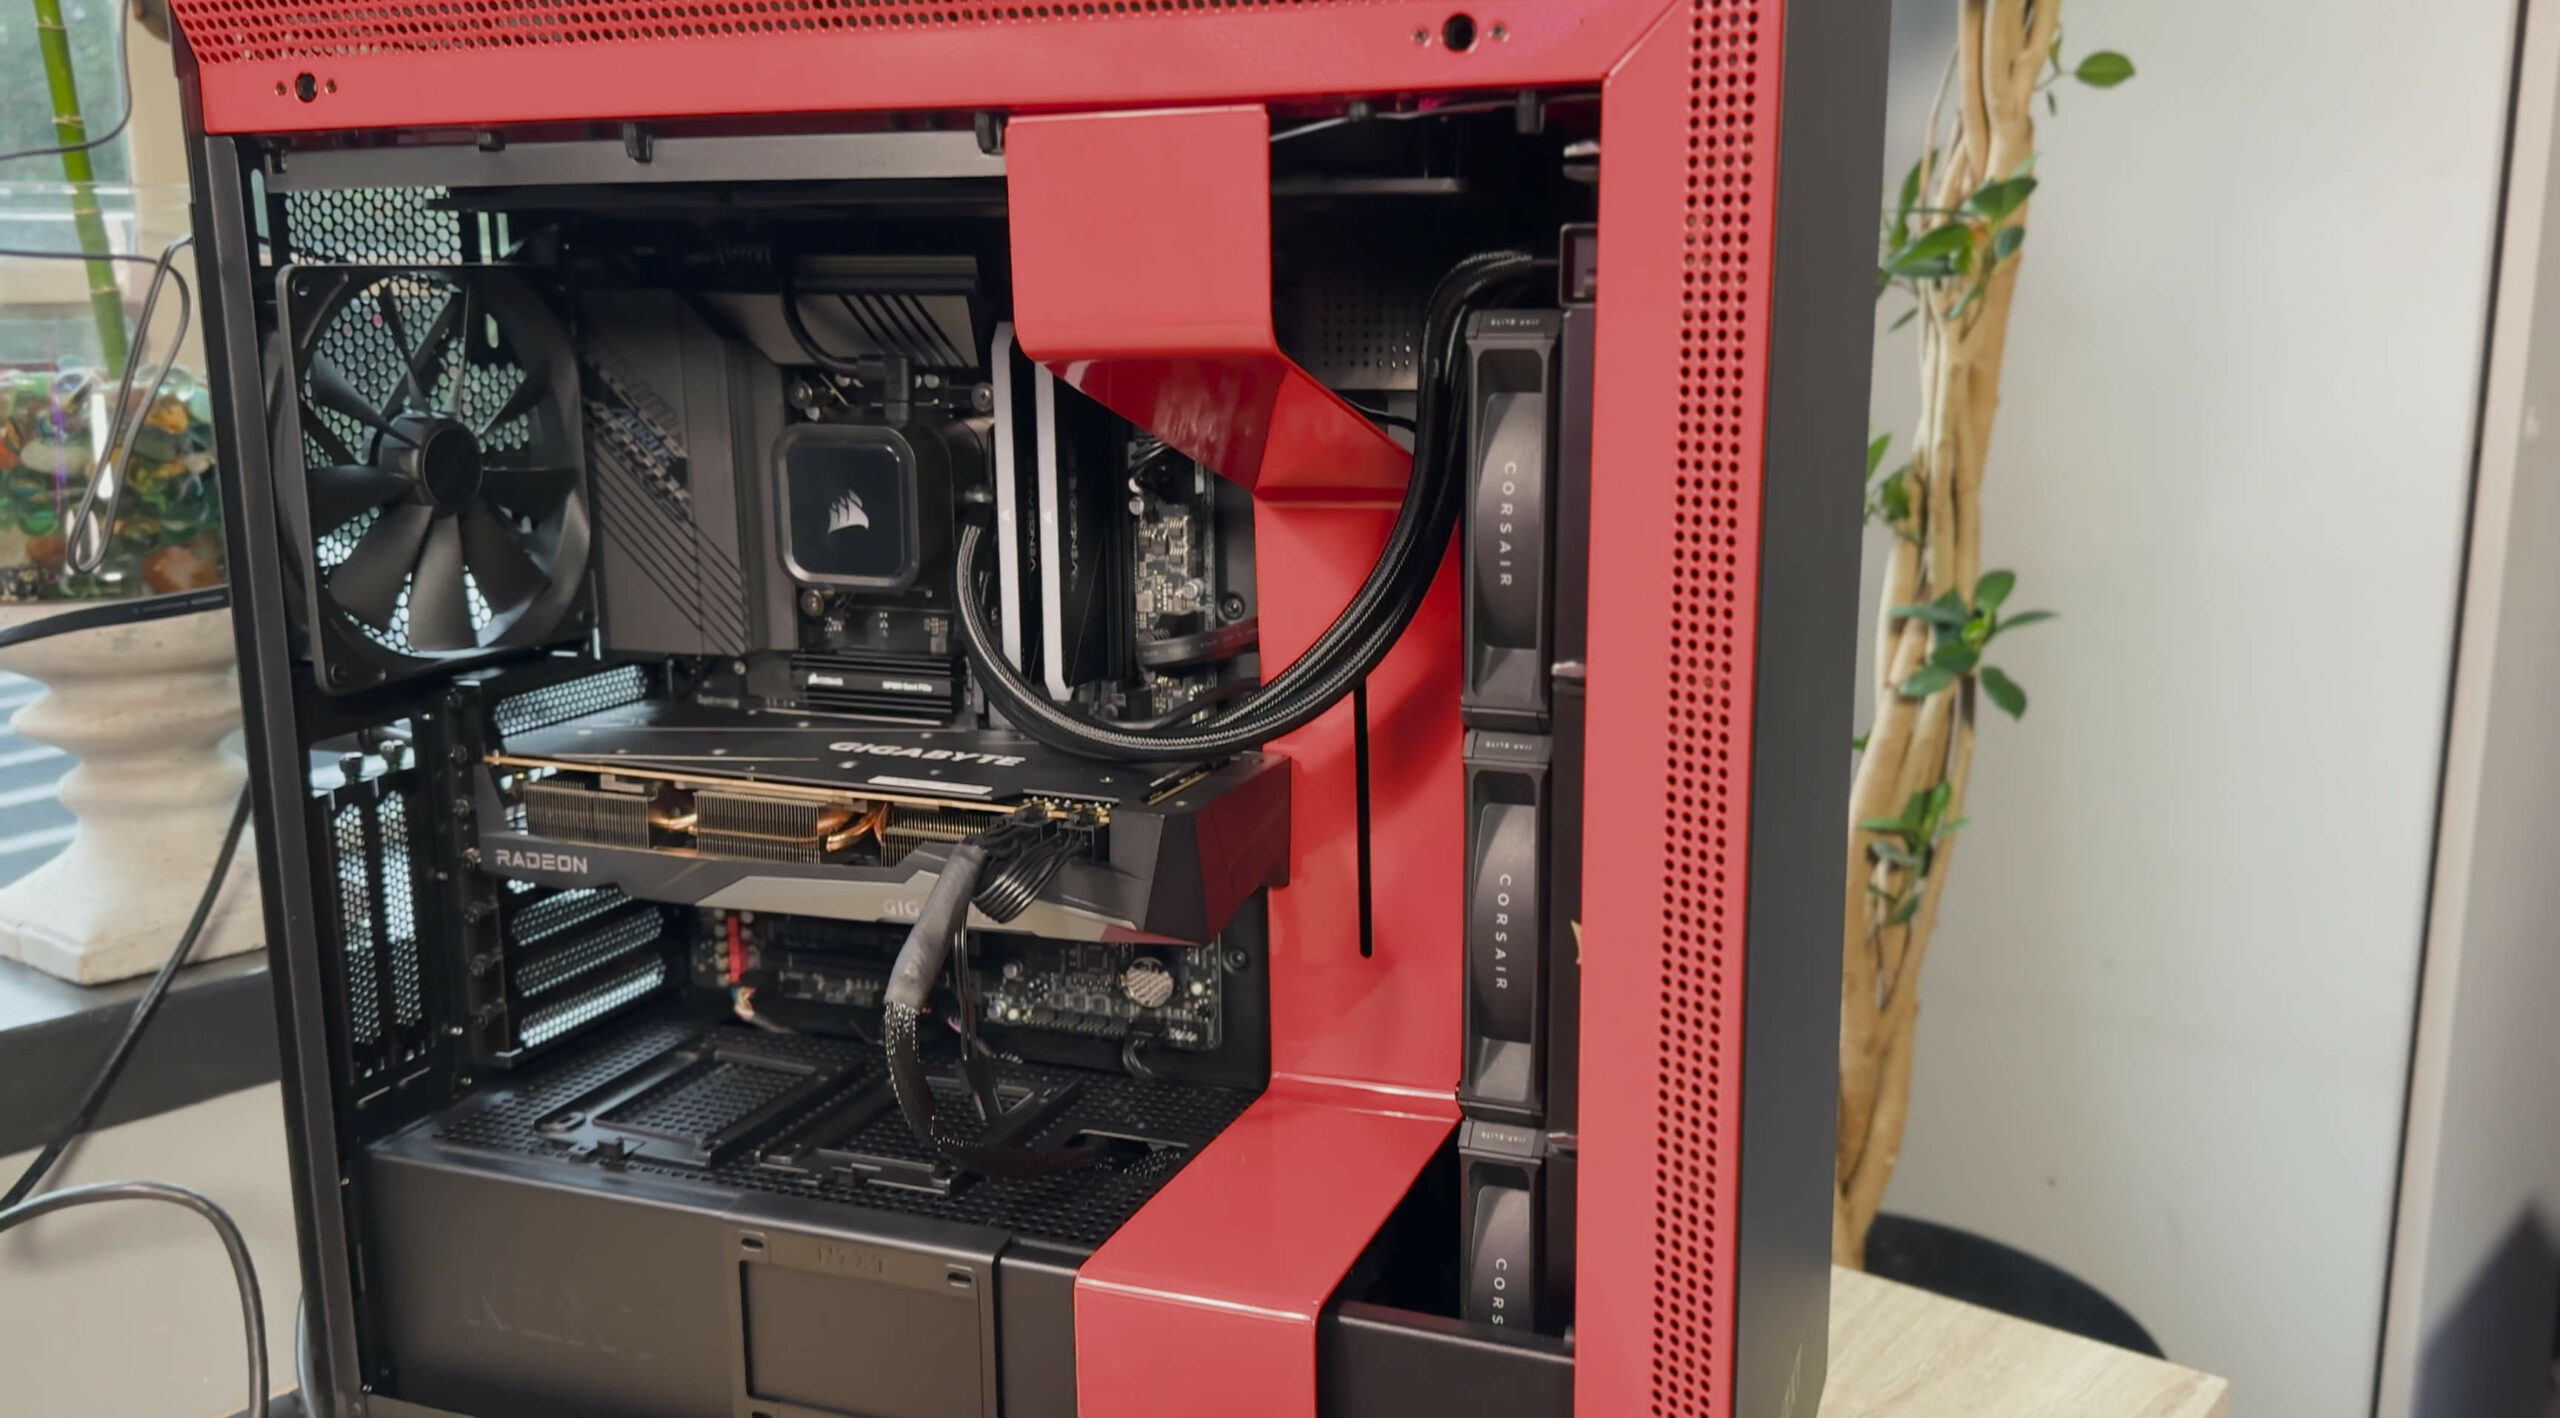
Case – NZXT H710i Black/Red
Now that we had the motherboard able to go, we wanted to arrange the case. I at all times advocate NZXT for low-cost PC instances. For underneath R2,000, this NZXT H710i value R1970, there’s a whole lot of worth for cash right here.
These instances include nice cooling assist, the newest case ports, a clear and minimal design and are fairly approachable in relation to set up. You’ll additionally be capable of get this similar mannequin in black, white and a black and crimson model which we picked up.
The case is probably going probably the most quantity of labor you’ll put in throughout the PC construct. You need to take away a spread of faces, unscrew steel brackets, place the motherboard, add the ability provide after which wire all of it collectively. Unless you’ve labored with a sure case earlier than, likelihood is you’ll get thrown a curveball someplace alongside the road which you weren’t anticipating. These hurdles can set your PC construct again a couple of hours when you’re not prepared for them.
PSU – NZXT C Series C850 850W ATX modular
After we screwed within the motherboard, the subsequent element was the ability provide. There’s nothing actually fancy about most energy provides available on the market. You can lay our a fortune on ones which have RGB and shows however when you’re easy, a primary one works out simply effective. This mannequin value R1880.
We went with the NZXT C Series C850 PSU. As the title suggests, it’s an 850W unit that may energy every part on the PC. It can also be modular which implies all of the cables plug into the unit and you may have a cleaner setup relying on what number of stuff you plug in.
The principal attraction of this energy provide, consider it or not, was its packaging. It got here with a cool purple bag that housed all of the cables. It may be a toiletry bag.. I don’t know what NZXT wished us to do with the bag however when you needed to put all of your toiletries in it if you went on vacation, I received’t decide you. It simply looks as if it was made for that.
Cooler – Corsair iCUE H150i RGB 360mm Liquid CPU Cooler
Now that the PSU was in alongside the motherboard, it was time for the cooler earlier than wiring all of it up. We went with the Corsair iCUE H150i cooler. It is a 360mm liquid cooler that has all the trendy options you search for. It value us R2,590.
Remember the hurdles I discussed earlier than? Well, that is the place our first hurdle arrived. The Corsair iCUE H150i doesn’t speak properly to the motherboard. At first, we wished to put in the cooler on the high of the case however as a result of motherboard’s heatsinks, it merely didn’t match.

There was the tiniest lip that jutted out on the high which prevented the fan rack on the NZXT case from sitting flush with the case. The one fan on the cooler bought in the best way. So after some complications and about an hour of the day wasted, we determined to only quit and put the cooler on the entrance. This means eradicating all of the pre-installed followers from the case and swapping them round with the cooler on the highest.
GPU – Gigabyte Radeon RX 6750 XT Gaming OC 12GB
Surprisingly, that was the one problem we encountered. For the primary time in my PC constructing profession, I plugged in all the ability cables, RGB and cooler wires they usually labored the primary time. Everything spoke to the PC and all of the lights got here on. I used to be fairly satisfied with myself.
The GPU was put in final and it was easy and straightforward. We went with the Gigabyte Radeon RX 6750 XT Gaming OC 12GB. I’ve reviewed this GPU in full up to now, it’s a incredible 1440p card that can also be fairly cost-efficient at R12,999.
Post-Build Tests
- Motherboard – Gigabyte B760 Aorus Master DDR4 – R5,999
- GPU – GPU – Gigabyte AMD Radeon RX 6750 Gaming OC 12GB – R12,500
- SSD – Corsair Force Series MP600 1TB NVMe PCIe M.2 SSD – R1950
- Chassis – NZXT H710i B/B – R1,970
- Cooler – Corsair iCUE H150i RGB 360mm Liquid CPU Cooler – R2,590
- CPU – Intel Core i5 13600K; Up to five.1GHZ – R6,099
- PSU – NZXT C Series C850 850W ATX modular PSU – R1,880
- RAM – Corsair VENGEANCE® RGB RS 32GB (2 x 16GB) DDR4 – R1,980
- Total – R34,968
I put in Windows 10 from a USB-C drive. If you may have an SSD or one thing with a USB C, I like to recommend doing this as a result of it vastly helps velocity the set up course of up because of the write velocity. After that, we up to date the BIOS on the Gigabyte B760 Aorus Master DDR4 and ran some exams.
We ran the superior Returnal benchmark on 1080p and set every part to Epic. The check gave us a mean fps of 60, max fps of 91 and minimal fps of 37. Testing Cyberpunk 2077 on 1080p with Ray Tracing Ultra, it gave us a mean fps of 107, max fps of 232 and minimal fps of 41.
The Thirteenth-Gen Intel Core i5 additionally carried out properly. During Cinebench R20 exams, I measured a max of 89C on the unit. This is with its multi-core clock at 5.1GHz. Cinebench R20 additionally gave us the next scores. I additionally ran some 3DMark exams:
Cinebench R20
- Single-Core – 771
- Multi-Core – 9183
Fire Strike Ultra
- Overall – 9083
- Graphics – 8981
- Physics – 38 828
- Combines – 4402
Time Spy Extreme
- Overall – 6469
- Graphics – 6283
- CPU – 7778
So ultimately, we took R35k and constructed fairly a good gaming PC that’s able to 1440p 60fps gaming. Sure, a number of the newest video games, Returnal included, may want some tweaking round within the settings with the intention to get the efficiency to the place you need it to be however usually talking, this PC ought to final you a couple of years.
I hope this was useful to these in search of a PC on a selected funds. I additionally hope to return to this within the months forward and maybe attempt to construct one other one later this 12 months and see if something has modified.